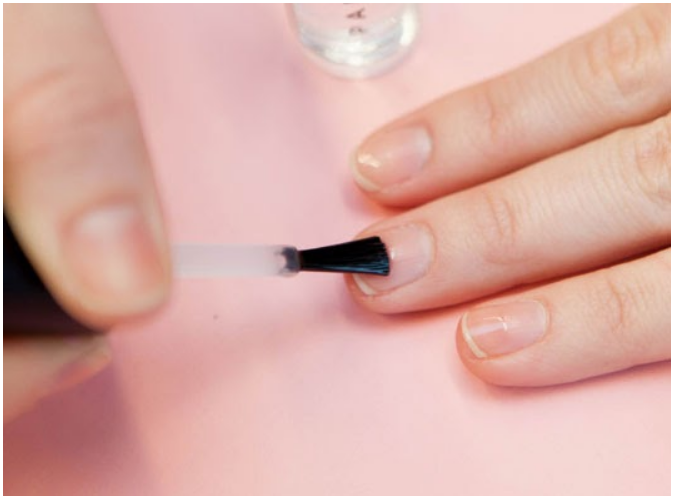
Category: Nail Care Tips

Healthy nails start with proper care before and after your appointment. In this section, Rachel’s Nails Reading shares practical nail care tips to help your gel nails, BIAB and acrylics last longer while keeping your natural nails strong. Learn how to protect your manicure, avoid common mistakes, and maintain beautiful nails at home between salon visits in Reading.

  • How To Remove Acrylic Nails – Easy And Safe

    How To Remove Acrylic Nails – Easy And Safe

    Acrylic nails are currently the hottest nail trend. With this nail style, you can have diversity in colors, lengths and designs of the nails while also creating high paint adhesion and flawless finish coating. However, removing acrylic nails is not as simple as you might think. It takes time and effort to remove acrylic nails at home. At our salon, we have professional nail technicians remove it in order not to damage your nails. Today, Rachel’s Nails will give you some suggestions on how to remove acrylic nails in easy and safe ways both at home and at our nail salon.

    How to remove acrylic nails at home

    Most clients do not want to spend time and money going to the salon just to remove the acrylic nails. We truly understand the problem that customers encounter. Here are 2 easy ways to remove acrylic nails with simplest tools that anyone can do at home.

    Using acetone and aluminum foil

    Necessary tools:

    • Nail clippers
    • Nail file
    • Buff
    • Cotton wool
    • Acetone nail cleaning solution
    • Aluminum foil
    • Vaseline and hand cream moisturizer
    • Orange stick
    • Bowls

    Steps:

    • Cut your nails short. To shorten the acrylic nails, use a nail clipper.

    Remove as much of the acrylic nail as you can. If you’re having trouble with this step because your nails are too thick, use a file to file them away. However, do not file the nail as this will cause it to bleed.

    • File the coating on the nail surface. File the polish with a good quality

    nail buff and try to file this acrylic nail as much as possible. It is best to file long lines that follow the length of the nails.

    • Pour acetone nail cleaning solution in a bowl. Pour out about half a

    glass bowl with acetone nail cleaning solution. Some people prefer to warm the acetone by placing it in a larger bowl of warm water so as to increase the heat of acetone. Never microwave acetone or use it near a high heat source. Acetone is extremely flammable. Make sure your room is well ventilated as acetone evaporates very quickly.

    • Apply Vaseline to the skin around your nails. Acetone can have a bad

    effect on the skin, so it’s better to protect your hands with vaseline. This step will protect your hands from being irritated by the acetone, especially if you have a agnail.

    • Soak your nails in acetone cleaning solution. Take a couple cotton

    wools that have been soaked in warm acetone and apply them on your fingernails. Wrap the cotton wool tightly around the acrylic nails with aluminum foil. After that, soak your nails in acetone for around 30 minutes.

    • Remove the aluminum foil and cotton wool from your fingertips. The

    cotton wool will remove the acrylic nail coating. If you’re soaking your nails in acetone, pull the nail off with an orange stick and gently remove the nail polish. If the acrylic nail paint is still firmly bonded to the nail, repeat the soaking process for another 20 minutes before attempting to remove the coating.

    • Use a soft buff to file away any remaining acrylic nails polish. Now

    that the acrylic powder has become softer after being soaked in acetone. You can file the remaining acrylic nails polish away. If the acrylic layer becomes hard while filing, use an acetone-soaked cotton wool to soften it.

    • Moisturize your hands. Acetone makes your skin extremely dry. Wash

    the acetone off with soap and water. After that, pat your skin dry and add lotion or moisturizer to soften it.

    Using dental floss

    Necessary tools:

    • Dental floss
    • Nail clippers
    • Buff
    • Cuticle pusher
    • Hand cream moisturizer or vaseline
    • Nail file

    Steps:

    • Find a partner. This method of removing acrylic nails requires a person to help you, as it requires both hands to pull the dental floss underneath the powder nail.
    • Pry up the bottom edge of your acrylic nails. Gently slip in and lift up the entire bottom edge of the nail bed using a cuticle pusher. Do it slowly and control because you do not want to hurt your nails bed.

    • Ask your friend to help you insert the dental floss into the bottom of the nail you just pry. Your friend should sit opposite you, pull the piece of the dental floss placed under the nail edge that has just been pry, with both hands firmly grasping the ends of the thread.
    • Your friend can start by pulling the floss back and forth under the nail powder. Make sure that your friend slides the thread while pulling it forward. This will cause the nail powder to gradually peel off. Continue to repeat this sawing motion until the acrylic nails have peeled off and are completely separated from your natural nail. Tell your partner not to pull the thread too fast. You don’t want your natural nails to wear off with your acrylic nails.

    • Use a buff and nail file to reshape your nails. You can use buff and nail files to re-file the nail shape as well as remove any remaining acrylic nail polish.
    • Moisturize your hands. During the process, your nails may be slightly damaged. You can use hand moisturizer to soften and heal your nails
    • How to remove acrylic nails at salon

    Removing acrylic nails at home seems to have more risk because you do not have enough equipment or experience doing it. Besides that, the cost of tools you buy to remove acrylic nails can be much higher when compared to going to a nail salon. Rachel’s Nails salon has the finest skills and tools to remove your nails precisely.

    The first step that my salon would usually take is to soak your nails in acetone. Since acrylic nails are composed of some chemicals, acetone (or something similar) will be required to get through the strong, protective coating during removal. When soaking off, a tiny pad will be soaked in polish remover, placed over the nail, and gently wrapped. Soaking will be done very carefully so as not to damage your nail bed.

    Filing is usually the next step. Our salon has special files and nail drill for removing acrylic nails. This will help to remove all the acrylic coating on top of your nails. They are perfectly suited for this type of work and can quickly remove the softened acrylic.

    Last but not least, only at Rachel’s Nails, we provide special nail coating polish for customers. After removing the acrylics from your nails, we will paint you the polish to top your nails. This ensures that your nails will be strong and safe after the removal.

    The whole process takes about 25 to 35 minutes so it is perfect for those who do not have time and tools to remove acrylic nails at home. We have talented manicurists and special equipment so we will always make sure that nail removal is smooth and safe. With only from £10, you can get the best nail removal service.

    1. Some advice for you
    • Do not pour acetone nail cleaning solution into a plastic bowl. It will decompose and damage the bowl and acetone may spill outside.
    • If you do not want to use acetone, there are acetone-free nail polish remover which is easy to buy and a perfect replacement for the normal acetone nail cleaning solution.
    • You can buy a specialized acrylic powder nail removal kit at the pharmacy.
    • Some people often think that it is unnecessary going to a nail salon just for nail removal. At Rachel’s Nails, we always recommend customers going to our salon to remove acrylic nails because improperly removing the acrylic makes it even more damaged and messy.
    • You should remove your acrylic nails after maximum 2 months in order not to encounter risks.
    • You should remove acrylic nails at home only if you have proper tools and your nails are strong enough.

    Warning

    • If removing the nail causes pain or the acrylic nails remains stuck after repeating the process, you should stop and go to the nail salon for advice.
    • Always keep acetone away from fire or high heat sources as it is highly flammable.
    • Using acrylic powder nails carries the risk of infection as the space between the natural nails and the powdered nails increases. This allows bacteria to enter. If your nails become thick and discolored, consult your personal doctor or dermatologist.
    • Pulling off acrylic nails, no matter how tempting it may seem, can cause harm to your nails. As a result, never rip or pull your acrylic nails off.

    Conclusion

    That’s all about removing acrylic nails both at the nail salon and at home.

    To remove acrylics, Rachel’s Nails uses professional acetone, special tools and provides the nail treatment coating on top of your nails after the removal. At Rachel’s Nails, we provide not only manicure service but also pedicure and beauty treatments. Everytime you go to our nail salon, we will serve you with the best services by talented nail technicians. We want to make sure that when customers come to Rachel’s Nails salon, they can have the ultimate experience. Our price is affordable to everyone. Besides that, we have high quality products and services. You can visit us at 12a Norcot Road, Reading, UK. Here is our website https://rachelsnails.co.uk/ and you can read our blogs to get more information about nails.

    Remove acrylic nails at home is quite simple, all you need to have is proper tools and make sure that you follow step-by-step instructions. If any unexpected problems happen, feel free to come to our nail salon or nearest health facilities for help.

    We hope that you can choose a suitable way to remove your acrylic nails safely and easily.

  • How To Stop Biting Nails: 4 Impressive Ways To Break Bad Habit

    How To Stop Biting Nails: 4 Impressive Ways To Break Bad Habit

    Nail biting is a habit of many people. This seemingly innocuous action has many potential health risks. Do not be subjective, the habit of biting your nails can cause unpredictable consequences for your health that you did not expect. Nail biting is one of the basic human responses, and this behavior is controlled by certain circuits in the brain, which means it can quickly develop into an automatic response. A lot of people bite their nails because they’re nervous, stressed, and it’s become a habit they don’t even know. The habit of biting your nails not only makes your hands ugly, but can also cause permanent damage to your nails, teeth or gums. Here are some for you about: how to stop biting nails?

    Maintain your nail health

    Get a manicure as often as possible. Getting a beautiful manicure will make you not want to bite, right?. Moreover, nail polish also helps you resist the urge to bite your nails because you don’t want to bite the nail polish or damage the nails. You will probably pay attention to keeping your nails so beautiful by not biting them.

    Health benefits of manicure:

    Exfoliate dead cells. The hands are often exposed to dust and dirt more than any other part of the body, so the skin of our hands must constantly regenerate new cells and eliminate old ones. The manicure process often includes both cleansing and moisturizing to remove dead cells. Your hands will stay smooth and fine lines will gradually fade.

    Relaxing moment. Getting a manicure is also a great way to relax and enjoy pampering. You can have your nails done to relieve your stress.

    At Rachel’s Nails, we provide classic manicure – the most basic nail

    service. To begin, the manicurist carefully sanitizes your hands to eliminate any remaining stains. Your hands are then bathed in vitamin C-infused water. Next, the nail technician presses and tidies your cuticles to ensure that you get clean nails. After that, they cut and shape your nails, and lightly massage them.

    Keep fingernails short.  If any nails grow too long, cut them short. A simple nail cut will help you keep your nails healthy and short enough to prevent you from biting more. Always carry a nail clipper with you. You can’t bite your nails if you don’t have nails to bite, right? Also, short nails are easier to keep and more hygienic than long nails.

    Use hand moisturizer. This is the way which many people use when they want to quit the habit of biting their nails. Hand cream will make you afraid to put your hand in your mouth because you know there are cosmetics. You should apply hand moisturizer thoroughly around your nails. Moreover, if you maintain this habit, you will have soft, fragrant hands every day. You will not have to worry about the problem: how to stop biting nails when you can prevent it by moisturizing your hand skin.

    Always keep your hands busy

    Find another habit instead of nail biting. Every time you crave nail biting, replace it with a new habit. Some people like to tap their fingers, twist their thumbs, interlock their hands, put their hands in their pockets, or simply stare at their hands. However, you need to make sure it’s not a bad habit, find habits that are helpful or at least harmless.

    Alternative habits for nail biting:

    Play with a small object. Carry a small rubber band, coin, or something to hold in your hand to replace the habit of biting your nails.

    Distract your hands when you often bite your nails. Identify a time when you often bite your nails, such as in the car or in class, and find ways to change this habit depending on the situation. If you are in class, focus on taking lots of notes. If you are in the car, you can play with your phone.

    Distract your hands by finding a new hobby. A new hobby will not only stop you from biting your nails, but you may also discover a new passion through it.

    Hobbies which you should try:

    Housecleaning. With this hobby, you’ll be rewarded with a cleaner, more organized home, which in turn will make you happier at home, too.

    Jogging. Physical activity releases endorphins, which help relieve stress. This is useful if you often bite your nails when you’re nervous.

    Having a manicure. Getting your nails done with beautiful designs is a creative way to get rid of the habit of biting your nails.

    Keep your mouth busy. While you should avoid creating a new habit, here are a few tips that can help keep your mouth busy and nail biting less.

    Tips to keep your mouth busy:

    Chew gum or eat peppermint candy all day. You will have a hard time biting your nails if your mouth is busy chewing gum or eating delicious candy. In addition, nails mixed with mint or orange flavors in candy will cause a feeling of disgust and make you stop.

    Bring a bottle of water with you. Wherever you go, you should bring a water bottle to take a sip during the moment you want to bite your nails. Drinking water not only helps you to gradually stop biting your nails, but also helps you to have better health as well as a more beautiful skin.

    Quit the habit of biting your nails one by one. 

     Step 1: Select a nail to “protect”. If there’s one nail that’s damaged more than the others, it’s probably best to start with that nail. If the nails are all the same, you can choose any nail you like. If you find it difficult to break a habit all at once, treating each nail one at a time can make this easier. This allows you to gradually establish better habits.

    Step 2: Do not bite selected nails for several days. You will probably be able to do this without much difficulty, but if you need help, you can wrap the bandage around the tip of your chosen finger. This way, you can block access to that nail and make it difficult to bite.

    Step 3: Notice how the protected nail looks better than the others. After a few days, the nail that is not bitten will grow out and pay off for your effort. Try not to bite your chosen nail during this time. If biting, bite the “unprotected” nails. Sometimes even knowing you have another nail to bite on is helpful, even if you don’t actually.

    Step 4: Choose a different nail to stop biting. Once you’ve grown a bitten nail for a while, you can start protecting another nail. However, during this time, it is important that you do not touch both the first and second fingers. You certainly don’t want to ruin your achievements by biting your first nail after moving on to a new goal!

    Cover your nails

    Paint your nails. Try using a bold color like red or black, which will be very ugly when chipped by gnawing. If you don’t like paint, polish your nails and apply a coat of nail polish or Vaseline cream. You will hardly bite your nails when you have such beautiful nails. This is a useful method on how to stop biting nails. You can quit bad habit and have lovely nails at the same time.

    At Rachel’s Nails, we have different types of nail services. You can go

    for a classic manicure with gel/shellac if you want simple nails. But you can always go for a full set acrylic extension if you like glamorous, beautiful  nails. When compared to other sites, the pricing and quality of the services here are quite reasonable.

    Attach false nails. This is also a great way to cover the nails. Go to a professional manicurist to get your nails done, including acrylics. Acrylic nails are very durable, and when you remove the fake nails, you will have real nails underneath.If you are really determined, you can choose to do expensive fake nails. That way you will not want to bite your luxurious nails.

    Wear gloves. Put gloves in your back pocket and put them on your hands every time you want to bite your nails. This tip will make you try harder to stop biting your nails if it’s the middle of summer and you look weird with gloves on. If the gloves make it difficult for you to write or do something, you will be more motivated to stop biting your nails. Tell yourself that if you didn’t have this bad habit, you wouldn’t have to wear gloves.

    Some advice for you on how to stop biting nails

    • Remember that severe nail biting can lead to health problems. When you

    bite your nails, you are constantly bringing bacteria from your hands into your mouth.

    • Motivate yourself with special rewards for not biting your nails. For

    example, if you go a week without biting your nails, go out to dinner with friends or buy yourself something really cute. If you feel like biting your nails, remember that you won’t get those rewards.

    • Think about when and how you started biting your nails. There may be an

    underlying cause of stress, anxiety, or boredom. Addressing potential problems can help you stop biting your nails and more.

    • Mark on your calendar every day that goes by without biting your nails.

    Try to get through as many days in a row as possible. In the end, when you look back, you will feel proud that you broke the habit.

    • Warning 

    You should know when to get help. If the habit of biting your nails has become such a serious problem that you are constantly biting your nails, frequently bleeding from your cuticles, or even losing your nails, you may not be able to break the habit on your own. In this case, you should see your doctor as soon as possible to determine if it is a symptom of a larger problem, such as obsessive-compulsive disorder (OCD).

    Nail biting can lead to serious harm. Nail biting puts pressure on your teeth. This habit can cause the position of the teeth to shift, causing chipping or damage to enamel. The area under the nails is home to many harmful bacteria such as Salmonella, E.Coli or bacteria that cause colds. When you bite your nails, they can get into your mouth and down into your stomach, causing illness in your body. 

    Conclusion

    Nail biting is a common habit in children, but today, adults, especially young people, often have this bad habit. And more dangerous is that most people think this is a normal habit that does not affect health at all. This is not only harmful to your health, but also affects the view of people around you.

    However, how to stop biting nails is not that difficult. The above methods that we mentioned will be able to help you gradually get rid of this bad habit. Every change takes time, so be patient to get the results you want. You will have a beautiful and healthy nail if you quit the habit of biting your nails.

    Looking at a hand with beautiful nails, you will not have the desire to “put your mouth” in and bite, right? So take some time to make your nails become beautiful by not biting them. Note that the nails should not be too long, otherwise the “desire” to bite the nails will return. You should also maintain a healthy and reasonable hobby so that your mouth does not feel “missing” when you do not bite your nails.

    After you have completely “failed” the extremely bad habit: nail biting, reward yourself! We hope that all the information that we provide to you is helpful and you will soon give up the nail biting habit.

  • How To Strengthen Nails: Easy Tips And Remedies

    How To Strengthen Nails: Easy Tips And Remedies

    You probably already know, taking care of your nails is just as important as taking care of your hands. Brittle nails can be quite painful, especially if they chip and break frequently. While it may appear that strengthening your weak nails is an insurmountable undertaking, there are numerous preventative measures and treatments you may attempt on your own.

    A strong, shiny nail will help to make your hands more charming. If you are a trendy lady who likes to change your nail polish color frequently, the best nail care tips are what you are always looking for. Through this article, Rachel’s Nails wants to share with you the easiest, practical and most effective nail care methods about the problem: how to strengthen nails.

    How to strengthen nails naturally 

    • Don’t let your nails grow too long

    Many women often think that long nails make their hands look slimmer and more graceful. However, when in contact with objects, long nails are easily scratched and broken, causing damage. This causes you to take time to nourish the nail back to the original. On the contrary, nails with a moderate length will be stronger and more glossy. Therefore, when your nails grow long, you should pay attention to neatly trimming them to keep your hands beautiful and clean.

    • Wear gloves while doing housework

    The things you do every day such as cooking, washing dishes, taking care of plants, cleaning the house greatly affect your nails. Toxic substances in cleaning products are the cause of dry and rough nail skin. Besides, when you take care of plants, the sand and bacteria outside easily stick to your hands and damage your nails. Therefore, you should use gloves during house cleaning days like this time to protect nails.

    Limit your water exposure. Don’t wet your nails for extended periods of time, such as when cleaning the dishes. Your nails may be more prone to breaking and splitting if you do not take the necessary measures.

    There’s nothing wrong with getting your nails wet, but don’t soak them for too long.

    How To Strengthen Nails

    • Do not overuse your nails

    Normally, many people use their fingernails to open soft drinks, pick vegetables or dial the phone. In fact, these habits are damaging factors for nails. Specifically, nails are subjected to great pressure from hard and sharp objects, making the nail tip soft and easy to scratch.

    One of the biggest reasons to avoid this is that you will break your nails. And if you use too much force, you could get your nails damaged.

    • Clean your nails everyday

    To maintain healthy nails, daily cleaning is extremely necessary. Every day, hands have to be exposed to contact with many different things that make bacteria easy to accumulate. Therefore, you should clean your nails at least once a day to ensure that they are always clean. Use a soft brush to wet and gently rub the nail to clean the nail, “dispel” dirt.

    • Add nutritional supplements 

    Biotin is a nutrient known for its ability to keep nails strong and shiny. In addition to taking care of the outside, you also need to nourish your nails from deep inside. Foods such as liver, eggs, cauliflower, avocado, peanuts, sweet potatoes… are rich sources of biotin. Similar to hair, nails are also made up of a horny substance called keratin. Therefore, in addition to adding biotin, you should add to your daily diet foods such as salmon, mackerel, etc. Besides, vitamin A, vitamin C and calcium are also essential nutrients to help strengthen nails and become healthier.

    • Massage your nails 

    This is a method that not only helps you nourish your nails but also stimulates nail growth. Apply moisturizing or nail care products to your nails and massage gently. The nutrients in the product will moisturize and soften the skin epidermis. Meanwhile, the massage stimulates blood circulation, helping nails grow longer and stronger.

    • Avoid contact with nail remover and polish

    As women, surely many ladies always want to change a variety of nail polish colors. However, you should not let the color stay on your nails longer than 2 months. This makes the nails more susceptible to yellowing and weakening. Better yet, remove the polish every month and let the nails recover for a while before continuing to beautify with a new color.

    According to beauty experts, frequent exposure to paint and remover solutions will make nails dry and less sharp. Therefore, it is best to limit nail polish to protect healthy and beautiful nails.

    How to strengthen nails after gel or acrylics

    Using Products to Treat Your Nails

    Take care of your nails by moisturizing them. Moisture will aid in the recovery of your nails after a gel manicure, which weakens them of most of their natural moisture. Nail moisturizer can be purchased at a local beauty supply or department shop. Every day, you should use a nail moisturizer. It should be applied to your nails and the skin around them.

    Keeping your nails strong

    Make use of a nail strengthener. If you don’t like having your nails polished, this is a good option. Instead of going for multicolored nails or extra gel products, follow up your gel manicure with a clear, strengthening treatment. Many clear strengtheners and colored polishes with strengthening solutions are available at pharmacy and cosmetics stores. Look for nail strengtheners that are branded “for problem nails.” Nail hardeners include some pretty strong chemicals, so don’t use them on a daily basis.

    Take care of your nails.

    If your nails aren’t healing as quickly as you’d want, get another manicure. Inform the manicurist that you want to preserve your nails from harm. They will be able to provide you with the appropriate treatment to maintain your nails strong as they heal after a gel manicure.

    At Rachel’s Nails, we provide classic manicure with 6 steps to strengthen your nails. Firstly, the manicurist gets your hands sanitized thoroughly in order to remove residual stains. Then, your hands are soaked off in vitamin C-infused water. After that, the nail technician pushes and tidies your cuticles so as to have clean nails, trims and shapes your nails, softly massages them. This makes your nails become stronger and more beautiful after the damage. If you want to moisturize your nails, you can always tell the manicurist so that they can treat you with the best services.

    Maintain a healthy diet. 

    Because your dietary habits might impact nail strength, eating properly after a manicure is essential. Make sure you’re getting enough protein, biotin, and calcium. Foods like blueberries contain antioxidants that help protect the body’s cells from damage, while leafy greens provide the iron you need for nail strength. Calcium in milk is an important mineral that helps your nails grow. Incorporating fish oil, vitamin D and coconut oil into your diet is also the way to optimally healthy nails.

    Do not attempt to peel off your manicure. 

    If your manicure is starting to peel and break, it may be tempting to remove it. This, however, will do additional harm to your nails. Make a new appointment or gently remove your manicure yourself if you wish to remove it.

    When you remove your polish, you might also remove the top layer of your nails. This is what makes them become more dry and brittle.

    Do not apply gel polish often

    Gel polish can be amusing, but if used excessively, it can have a negative impact on nail health. Take a break from the gel polish every now and then to allow your nails to recover properly. Allow your natural nails to relax for a few weeks before getting your nails done again.

    Cuticles should not be cut

    Instead of trimming your cuticles after a gel manicure, push them back. Your cuticles safeguard your growing nails, therefore they’re essential for healing after a gel manicure. During the healing period, you should also treat your cuticles with hand lotions and gels.

    Homemade remedies to strengthen your nails at home

    Lemon juice

    Lemon juice is the perfect “savior” to make nails shiny and stronger. The acidic nature of lemon will remove the yellow pigment of the nails, bringing this beautiful nail. Lemon is also a popular and easy-to-find ingredient in the kitchen corner of any family. How to take care of nails with lemon juice is also quite simple. Squeeze the lemon juice into a small bowl. Then, wet a cotton ball in lemon juice and apply it to your nails. Continue to apply more times and let the nails dry naturally. Finally, just wash your hands with warm water.

    Olive oil

    Olive oil is famous for its nutrients that help nourish skin cells to stay soft. Besides, olive oil penetrates the skin and nails, assisting in the healing of damaged nails as well as softening cuticles. is very useful in keeping nails from cracking or breaking. You should soak your nails in a small amount of olive oil at least twice a week. Pay attention, massage your hands to penetrate more deeply.

    Coconut oil

    Coconut oil’s saturated fat is extremely beneficial for weak and brittle nails. It will also help to avoid many types of nail infections. You may do this by gently warming some coconut oil and applying it to each nail. For five minutes, massage softly and completely. Apply this treatment two to three times each day.

    Egg yolk and milk

    Just like your skin, nails need to be well-moisturized. You can create a nourishing nail mask by combining egg yolk and raw milk .Egg yolk and milk are excellent moisturizers for your nails, promoting healthy growth. Mix this mixture well and massage gently and then wash your nails. Moisturize your nails with this mixture regularly to keep them strong.

    Tea tree oil and vitamin E

    Brittle nails can be caused by a fungal infection, which tea tree oil helps treat. Apply the mixture of vitamin E and tea tree oil to your nails and nail beds and allow it on for 30 minutes before rinsing. Remember to moisturize your nails afterward.

    Some advice for you on how to strengthen nails

    • Let your nails grow naturally as well as practice having good habits.
    • Always carry a nail file. Once a nail is broken or chipped, it is better to file the nail than to cut it off.
    • Massage the cuticles for 15-20 seconds every night before going to bed to improve blood circulation around the nails.
    • If you’ve tried everything and nothing works, visit your doctor or you can come to our nail salon for a checkup. There might be an underlying problem causing your nails to be thin or brittle, and only by treating the main cause will your nails be able to heal.
    • Checking your nails regularly is a really healthy habit. Because the first signs of health problems may show up on the nails such as black streaks on the nails, dry nails easily broken, nails are no longer smooth, ripples vertically or horizontally on your nails. You need to see a dermatologist if your nails have one of these signs.

    Conclusion

    The true happiness of being a girl is having a beautiful set of nails. However, not  many women know how to take care of their nails, so they make the nails increasingly weak and appear to have many weak and brittle nails. All the information that Rachel’s Nails has provided above may help you overcome this situation. How to strengthen your nails is not that difficult.

    Make sure that you have basic knowledge in nail care and protection every day.

    The improvement of well-moisturized and strong nails needs a long time and persistence to achieve high results. You can use natural ingredients available at home for nail care or come to our nail salon for nail care in order to have faster results. You can visit us at 12a Norcot Road, Reading, UK or at our website https://rachelsnails.co.uk/.

    We hope that this article can help you to figure out the proper ways to strengthen your nails.

  • How To File Nails Properly Without Damage Natural Nails

    How To File Nails Properly Without Damage Natural Nails

    In order to have a beautiful hand, women are often interested in filing their nails to bring the nail shape that best suits them. In addition, how to file nails also shape your nails become more beautiful because most nail styles will have different nail shaping methods. Here are some tips Rachel’s Nails suggest you to have beautiful nail files simply.

    How to file nails at home

    Filing your nails to keep them healthy is an easy way to ensure good nail health at home. You may have shapely and strong nails by using the proper nail file, selecting a nice shape for your nails, and filing in the proper places and directions.

    • Step 1: Getting Your Nails Ready

    Hands should be washed. Before filing your nails, carefully wash your hands with soap and water to remove any film or oil that may interfere with your filing.

    How To File Nails

    • Step 2: Select a nail file. 

    While there are numerous types of nail files available, emery boards are both inexpensive and efficient. To keep the edges from looking harsh or scraggly, use a file with a softer grit of approximately 180-200. If you wish to finish your nails with a different file, pick one with a high grit, approximately 300-600, to obtain the cleanest edge. At home, we recommend you to use the nail file with 240 grit.

    Coarse grits, such as 80-100 grit, should only be used on artificial nails. They will break up your natural nails if used with them.

    Metal files should be avoided since they might rip your natural nails.

    Glass, or crystal files are highly effective and can be readily cleaned in the dishwasher, but they are more difficult to find and use than regular ones.

    • Step 3: Make a decision on the form of your nails. 

    There are numerous different nail shapes to select from, but the most common are oval, square, and almond. The form you choose will be determined by your preferences and the type of nails you have.

    • Oval nails are ideal for growing out and keeping your nails. It’s the most practical since your nails are less prone to fall off in this form.The tip of oval-shaped nails is symmetrically circular. This nail style has an elongated, feminine appearance.
    • Square-shaped nails make a bold statement and look fantastic on those with long nails. The square form is achieved by filing the nail straight from the tip all the way across.
    • Almond-shaped nails are excellent for making your fingers appear slimmer. The design resembles the curvature at the base of your nail.
    • Do you have short nails that you can’t shape? It isn’t a huge deal. Use what you’ve got and apply cuticle oil to your nails every night to help them grow for future shaping.

    Step 4: Shaping your nails

    • Oval shape

    Make an oval form using your nail clipper. 

    If your nails aren’t already oval, you might want to start by cutting them into the proper overall shape. To make a rough oval template, use a sharp, clean pair of manicure scissors to cut off angular corners and any extra length. Trim gently and carefully to avoid cutting into your skin. If you are unclear about the exact form you want to create, you can use an image as a guide. When you file, you will be able to refine the form even further.

    Using a 240-grit file, file the edge of each nail straight across. 

    This top edge of the nail is known as the “free edge,” and it finishes at the tip of the finger. Place the file between your thumb and index finger, at a little angle to the edge of the nail. Run the file across the free edge 3-4 times in one direction along yoủ nails, taking care not to file against the skin of your finger. Make sure to be gentle at first, do it slowly and control.

    Hold the file under the corner of the nail, tilt it 45 degrees, and round the corner. 

    Pull the 240-grit file over the corner in a smooth, rounding motion to create a rounded edge. Repeat 3-4 times, then double-check your work. The corners should be rounded rather than flat or pointed. If it isn’t rounded, file it a couple more times using the rounding action. Then, repeat on the opposite side.

    • Square shape

    The first step is as the same as when you do with the oval shape

    File your nails in a straight line

    Once you have your nails to the desired length, you can start shaping them using the 240 grit nail file. First, file the top edges of the nail (the part that was just cut) in a straight line. In case the nail is too short and too close to the flesh, make sure that when filing you do not touch this delicate skin underneath.

    Check the length of the nails

    After you have cut and filed your nails in a basic square shape, check to see if your nails are straight and beautiful as desired. You can turn your hand upside down, point your palm towards your face, and see the length of your fingers. Pay attention to check the evenness between the fingers and adjust them like the 2 steps above.

    File your nail edges

    Place the nail file at a 45-degree angle to the edge of the nail, then start filing to shape them. Continue to keep the motion and pull the file up to the upper corner of the nail to create a square nail shape and smooth edge. At the same time, you also need to pay attention to the force of your hand when filing, to avoid causing damage and pain to the nail surface.

    Round shape

    Clip the Edges

    It is recommended to build this nail form out of square nails. If you have long nails, just shape them into a square form. After you’ve created a square form, trim the edges until the nail resembles a very short coffin nail. Later on, you will file it into the right form.

    File and shape your nails

    After you’ve cut the edges of the nail, begin filing it into the desired shape. Begin from the side of the nail and file towards the middle in the same way. Make sure that you just go in one direction. Begin from the side of the nail and file towards the middle in the same way. When you see one side of the nail becoming rounder, switch to the other side.

    Step 5: To smooth the surface of your nails, use a buffer.

    With a vigorous back and forth motion, rub a nail buffer horizontally over the surface of your nails. This smoothes out flaws in the nails that a file cannot address.

    Step 6: Moisturize your cuticles and apply cuticle oil. 

    To promote healthy nails, apply cuticle oil to your nails on a regular basis and keep your hands hydrated. Apply cuticle oil and moisturizer to your hands after each wash. Keeping your cuticles hydrated will aid in the prevention of hangnails. Keep cuticle oil and moisturizer beside your sink as a reminder to apply them on a regular basis.

    Step 7: Every couple of weeks, file your nails. 

    You should only file your nails every two to four weeks. Filing your nails too regularly might harm them by not allowing them to grow correctly.

    How to file nails at salon

    At Rachel’s Nails salon, nail filing often comes with classic manicure. Besides the nail filing services, you can get your nails cared for by our talented manicurists. Your hands will be soaked in vitamin C in order to moisturize them. Then the nail technicians will push and tidy your cuticles so as to have clean nails, trim and shape your nails, and softly massage them.

    We recommend you get your nails filed at the salon if you do not have enough proper tools at home. Nails filling at the salon will save your time because having someone shape your nails for you is always better than doing it by yourself. 

    Some questions about how to file your nails at home?

    Q: Is it okay to file my nails while applying nail polish?

    A: It’s great if you can file your nails when they’re naked, since the polish may flake and split, making them look terrible.

    Q: What is a hangnail? Can it be harmful for my hands?

    A: Hangnail is a common phenomenon, nails are scratched due to dry cuticle skin or caused by cutting too close to the nail. This problem can be treated by softening the skin around the nail with oil and trimming the flaking skin with scissors. Hangnail is a normal disorder, but if you are not careful to get an infection, it will be very dangerous.

    Q: How many tools do I need when filing nails at home?

    A: The basic tools for nail filing at home include: nail clipper to cut your nails short, nail file to shape your nails and buffer. You can always add moisturizer into this process to smoothen your skin and nails.

    Summary

    Filing your nails is an excellent method to keep them at a consistent length and shape, and it can help protect your nails from breaking. However, improper nail filing can result in jagged, ragged nails, as well as nail bed or cuticle damage.

    Rather than sawing back and forth with the file, it is preferable to file from the outside corner towards the middle of the nail and repeat the action on both sides.

    If you do not have enough necessary tools at home, we recommend going to the salon so that you can get your nails perfectly filed without damaging your natural nails. When coming to the nail salon, the nail technicians can suggest the suitable nail shape for your hands.

    We hope that this article will help you to answer the question: how to file nails properly both at home and at nail salons.

  • How Long Do Acrylic Nails Last ?

    How Long Do Acrylic Nails Last ?

    How long do acrylic nails last? Generally, you may wear them for up to three months without harming your fingernails if you care for them correctly.

    If you need assistance with taking care of your acrylic nails, you’re in luck because we’ve got some great suggestions for keeping your acrylic tips. Keep reading our  But, before we get to the advice, let’s go through what these nails are.

    What Exactly Are Acrylic Nails?

    These are artificial nails composed of a powdered polymer and a liquid monomer. These two components combine to form a dough-like ball that is bonded to your fingernail and then molded into whatever shape you choose. The majority of individuals use them to fill up damaged or bitten nails, but many more use them as nail extensions.

    Acrylic nails are typically safe to wear as long as they are well-maintained and kept healthy, but they may also serve as a breeding ground for skin infections if you are not careful with them.

    How long do acrylic nails last?

    A question many women have when applying nail polish is how long nail powder will last. Actually, this is a question with no definite answer. Because the durability of the nails will depend a lot on your aftercare and the skill of the manicurist.

    Durability is ensured by a professional nail technician.

    If the acrylic nails were done by a skilled nail technician, the customer should have the longest-lasting nails possible.

    Instead of nail polish, the nail technician might put a gel layer on top of the artificial nails. The gel provides the nails a more beautiful appearance and lasts longer than nail polish. With the gel coating, your acrylic nails should last longer.

    Clients have an impact on how long acrylic nails last.

    Acrylic nails are a long-lasting, long-lasting alternative to conventional lacquer manicures. A complete set of acrylics should last between six and eight weeks.

    The natural nails of your client grow. Even if your client’s acrylic does not crack or break, a fill-in visit is required.

    Besides, the quality of the nail powder layer will also directly affect the durability of the nail. If the manicurist is skilled and the quality of the powder is good, the retention time will be longer.

    Normally, the average time to keep powder in the nail falls between 10 and 15 days. If you can take better care, this time can be extended by a few days.

    After you’ve done your nails, your nail technician will show you a few things to keep in mind for your nails. Follow the advice of experts. At that time, your nail powder will be kept for a long time.

    How To Make Your Acrylic Nails Last Longer

    Customers regularly have no idea how to care for their nails and then criticize the product or the nail technician. It is your responsibility to educate your clientele.

    Here are some suggestions on how to care for your client’s nails so that her acrylic nails last longer.

    • Conduct Research

    If you want the greatest acrylic nails possible, you should look around your area for the top salons with the best nail technicians. We understand that this may appear to be a lot of effort at first, but you’ll thank yourself later after you’ve completed the ideal set of nails.

    When looking for the ideal salon, check for good indications like clean working areas, clean tools. You may also check up on their technicians online to determine whether their work is suitable for your requirements and style.

    At Rachel’s Nails salon, we provide acrylic nails extension service. Only from  £37 your nails will be soaked off and begin with a totally fresh full set coated with acrylic powder. We have talented nail technicians and a wide range of choices for you to choose from.

    • Do Not Ignore Regular Fills

    You must conduct some maintenance every couple of weeks unless you want damaged and even painful nails.

    Because your fingernails will continue to grow beneath your acrylic nails, you must get your artificial nails filled on a regular basis. If you know what you’re doing, you can do it yourself at home, but it’s typically safer to have a professional do it for you.

    Most people need to have their acrylic nails filled every two weeks, although this might vary depending on how long it takes their nails to grow out. Having said that, you shouldn’t put off getting a fill for too long — unmaintained acrylic nails can ultimately shatter and even harm the real nails below them.

    • Keep your acrylic nails clean on a regular basis

    Because artificial nails can store more bacteria than fingernails, you should keep them as clean as possible. Clean out any dirt on and under them with a gentle brush, and make sure your hands and nails are fully dry after washing them.

    • Keep your hands moisturized

    You must also take care of your natural nails if you want stronger artificial nails. Maintain the health of your hands and fingers by using a daily moisturizer and applying cuticle oil to your nails anytime they appear dry.

    • When doing manual housework, use gloves.

    Your nails may ultimately wear out after a couple weeks, but you may delay this by using protective gloves when doing household tasks. Because acrylic nails are susceptible to high temperatures and volatile chemicals, you should limit their exposure to chemicals found in cleaning products and hot water.

    • Take Care of Your Nails

    We understand how tempting it is to use our long nails to pry things open, but they aren’t all that powerful. Too much force can break your acrylic nails and harm your natural nail bed below, so try to be delicate with them.

    • Every two to three months, allow your nails to “relax”

    While nails do not require relaxing, they do require time without any modifications to repair and become stronger. Allow your nails to develop on their own without your fake nails if you want to maintain them healthy and ready for acrylic nails.

    • Stop biting your nails

    In daily life, you should give up the habit of biting your nails. This not only affects the durability of the nails but also harms health when the composition of the powder contains acrylic substances. Here is our article about how to stop biting nails.

    Acrylic Nail Removal

    When it comes time to remove your acrylic nails, you’ll be better off looking for a professional because incorrect removal can be harmful to your natural nails.

    If your nails must be removed before you can schedule an appointment, you may do it at home by following our instructions. The easiest way is to cut your nails short, file as much of the acrylic off as possible, and soak them in acetone for 15-20 minutes. After you’ve done all of that, your acrylic nails should be soft enough to remove securely.

    Summary

    If you opt to wear acrylics for a long time, you will most likely need to have fills every two weeks to keep your manicure looking good. If you’re thinking of using them for an event and then having them professionally removed right after, that’s a great option as well. Acrylics are a “sometimes” or “usually” style statement for many people, rather than a lifetime commitment.

    Remember that attempting to remove acrylics at home is seldom a smart idea since you can quickly harm the underlying natural nail. Besides that, make sure to follow our suggestion above to keep your acrylic nails last longer.

    While most individuals can wait around two weeks before fillings, it’s important to understand that you may not be able to wait 14 days every time. Some tiny lifts or separations of the acrylic can be repaired at home, you should get an expert or come to Rachel’s Nails salon for help as soon as possible if you have a large break or crack to avoid infection.

  • How To Dry Nails Fast – Quick Tips

    How To Dry Nails Fast – Quick Tips

    There is no better way to spend some relaxed time than to acquire or give yourself a beautiful manicure. Nothing beats a stylish set of nails, whether you’ve been eyeing numerous cosmetic trends or want to keep things simple with an everyday manicure.

    All of the pleasure, though, comes to an end when it’s time to dry your nails. You risk damaging your manicure if you don’t wait long enough. And, of course, with a hectic schedule, waiting too long is out of the question. So you’re probably wondering how to dry nails quickly. Look no further if you’re sick of dealing with a smeared manicure.

    We’ll show you how to dry nails fast, including some useful suggestions, in the section below. But first, let’s look at how long nail paint should take to dry.

    How long does it take for nails to dry completely?

    It’s time to address the age-old question: How long does nail polish take to dry? While it’s tempting to believe that your nails only require 10 to 15 minutes to dry, previous manicure sessions have proven that even after waiting, your nails might get smeared.

    The fact is that nail paint might take up to two hours to dry. And, while a few hours might feel like an eternity when you have a busy schedule, it’s critical to get your manicure to set quickly so you can get on with your day.

    Because the surface layer of your nails dries first, you may believe they dry faster than they actually do. You may softly touch your nails and feel them dry, only to ruin them a minute later when you use your hands for anything.

    This is due to the fact that your nails are only dry on the surface; the lacquer below is still wet and might be damaged, smeared, and so on.

    How to dry nails fast without making smeared 

    Are you ready to find out how to dry your nails quickly? Continue reading for four ideas on how to speed up the drying process and achieve a perfect manicure in no time.

    Using fast-drying nail polish

    Using fast-drying nail paint is one of the simplest techniques to help your manicure dry quickly. Fast-drying nail lacquer, unlike other nail paint formulations, works to dry and set your nails in a matter of minutes. There is no need for a lengthy drying time. With so many color and finish options available, you’re sure to discover the right polish for you.

    Paint thin nail layers

    Paint your nail paint on in light, thin layers, allowing each layer to dry between coats. Apply 2-3 thin, light coats of polish after wiping off a bit of polish from your applicator brush. Allow your polish to dry for 1-3 minutes between coats. If you apply numerous thick coats of nail polish, it will not dry fully.

    • It will take longer to apply the polish this way, but it will dry much faster.
    • Paint each nail one at a time, then repeat in the same sequence. If you take your time painting each nail, the first one will be ready for its second coat by the time you finish the last one.

    Hair dryer is also a very good option

    For a quick fix, use a blow dryer to blast cold air for 2-3 minutes. Connect your hairdryer and set it to the cold air setting. Then, for 2-3 minutes, run the cool air across your fingertips. The chilly air may cause your nails to dry rapidly.

    • Do this for both hands to fully dry each nail.
    • Before you begin, make sure the dryer is set to the low setting. To avoid harming the polish, hold the hairdryer 12 inches (30 cm) above your nails as you dry them.
    • Your nail paint may begin to bubble or ripple if you use a warm heat setting or hold the dryer too near.

    Immerse your fingertips in a basin of cold ice water

    Allow your nails to air dry for 60 seconds before filling a small basin halfway with extremely cold water. Then, add 2-5 ice cubes. Hold your fingertips in the icy water for 1-2 minutes before removing them from the dish. In general, cold hardens nail paint, so an ice bath is an excellent technique to get your nail polish to adhere.

    • When applying this method, use caution since it might damage your nail paint if you dip your hands in the water too quickly. The polish should be virtually dry at this point.
    • While this speeds up the drying time of your nail paint, it will make your hands incredibly freezing!

    Put your hands in the freezer

    As much as we dislike being cold, when it comes to our nails and the opportunity to not smudge them before they’re dry, we’re ready to go to any length. In this situation, it entails placing your hands in the freezer for a few minutes. The cold air will assist to harden the top coat of polish, allowing you not to be too cautious after having your manicure done.

    Spray your wet nails with an air duster

    An air duster is a blast of chilly, pressurized air that shoots out fast. Hold the can around 30-45cm away from your hands to keep them from getting too chilly. Your nails should be mostly dry after a quick 3-5 second spray over your fingertips. Because the air is chilly, this works great for drying nail paint. Make sure the sprayer is aimed towards your nails.

    • Before you spray your nails, make sure they’re mostly dry, since air duster might damage your nail paint. You may unintentionally harm the polish’s surface.
    • Air duster may be purchased at most office supply stores.

    To save time, try using drying drops or setting spray

    Are you ready to decrease your drying time in half without making a mess? It’s time to get to know quick-dry nail drops. This product not only dries your manicure quickly, but it also protects your nails from dents, smudges, and scratches. Some formulations are also effective at nourishing your cuticles and nails. Essentially, it is a must-have. All you have to do is dab one or two drops onto newly polished nails. Wait a minute or two for them to dry, and everything is ready to go!

    When it comes to avoiding messes, a nail polish drying spray is a wonderful option. You can depend on obtaining the perfect manicure with every usage because it is ideal for minimizing drying time. Simply wait a minute after painting your nails before spraying evenly over each nail with the can held a few inches away from your hands.

    • Nail drying treatments, such as sprays and drops, are available at many beauty supply and pharmacy stores.

    Frequently asked question about how to dry nails fast

    Q: Can I dry my nails in front of an air conditioner rather than a freezer?

    A: Yes, this will aid in the drying of your nails. Anything that helps your nails harden faster will help them cool faster.

    Q: Can I wash my hands in the sink with cold water?

    A: Cold water can assist, but make sure it isn’t a strong stream otherwise it can ruin your nail polish/varnish.

    Q: Is the ice water technique suitable for nail art?

    A: It is determined by the amount of nail art present. If there is only a small amount, it will dry properly. If there is a lot, it will either fail or take a very long time. However, if you use a fast-drying top coat, that will assist. In this instance, we propose that you use UV/LED light to dry your nails.

    Summary

    There is nothing more frustrating than spending a couple of hours sitting with your hands in front of you, trying to avoid touching things for fear of damaging your freshly painted nails. We hope that all the information that Rachel’s Nails has provided above may help you overcome this situation. How to dry nails fast is not that difficult.

    Every day, ensure that you have a fundamental understanding of nail care and protection. You can apply all of the nail care methods we listed above or come to our nail salon for nail care to get faster results. We may be found at 12a Norcot Road, Reading, UK, or online at https://rachelsnails.co.uk/.

    We believe that this article can help you to figure out the proper ways about how to dry your nails fast with easy tips.

For last minute appointments or booking issues please direct call our number 07402286286.