Category: Nail Advice Reading

Looking for honest nail advice in Reading? This section answers the most common questions our clients ask about gel nails, BIAB, acrylic nails, nail extensions, infills, and nail health. At Rachel’s Nails in Reading, we share expert guidance to help you understand why nails lift, peel, chip, or weaken — and how to make your manicure last longer. If you live in Reading, Caversham, Tilehurst, Earley or nearby, these guides will help you choose the right nail treatment for your lifestyle.

  • How To Remove Acrylic Nails – Easy And Safe

    How To Remove Acrylic Nails – Easy And Safe

    Acrylic nails are currently the hottest nail trend. With this nail style, you can have diversity in colors, lengths and designs of the nails while also creating high paint adhesion and flawless finish coating. However, removing acrylic nails is not as simple as you might think. It takes time and effort to remove acrylic nails at home. At our salon, we have professional nail technicians remove it in order not to damage your nails. Today, Rachel’s Nails will give you some suggestions on how to remove acrylic nails in easy and safe ways both at home and at our nail salon.

    How to remove acrylic nails at home

    Most clients do not want to spend time and money going to the salon just to remove the acrylic nails. We truly understand the problem that customers encounter. Here are 2 easy ways to remove acrylic nails with simplest tools that anyone can do at home.

    Using acetone and aluminum foil

    Necessary tools:

    • Nail clippers
    • Nail file
    • Buff
    • Cotton wool
    • Acetone nail cleaning solution
    • Aluminum foil
    • Vaseline and hand cream moisturizer
    • Orange stick
    • Bowls

    Steps:

    • Cut your nails short. To shorten the acrylic nails, use a nail clipper.

    Remove as much of the acrylic nail as you can. If you’re having trouble with this step because your nails are too thick, use a file to file them away. However, do not file the nail as this will cause it to bleed.

    • File the coating on the nail surface. File the polish with a good quality

    nail buff and try to file this acrylic nail as much as possible. It is best to file long lines that follow the length of the nails.

    • Pour acetone nail cleaning solution in a bowl. Pour out about half a

    glass bowl with acetone nail cleaning solution. Some people prefer to warm the acetone by placing it in a larger bowl of warm water so as to increase the heat of acetone. Never microwave acetone or use it near a high heat source. Acetone is extremely flammable. Make sure your room is well ventilated as acetone evaporates very quickly.

    • Apply Vaseline to the skin around your nails. Acetone can have a bad

    effect on the skin, so it’s better to protect your hands with vaseline. This step will protect your hands from being irritated by the acetone, especially if you have a agnail.

    • Soak your nails in acetone cleaning solution. Take a couple cotton

    wools that have been soaked in warm acetone and apply them on your fingernails. Wrap the cotton wool tightly around the acrylic nails with aluminum foil. After that, soak your nails in acetone for around 30 minutes.

    • Remove the aluminum foil and cotton wool from your fingertips. The

    cotton wool will remove the acrylic nail coating. If you’re soaking your nails in acetone, pull the nail off with an orange stick and gently remove the nail polish. If the acrylic nail paint is still firmly bonded to the nail, repeat the soaking process for another 20 minutes before attempting to remove the coating.

    • Use a soft buff to file away any remaining acrylic nails polish. Now

    that the acrylic powder has become softer after being soaked in acetone. You can file the remaining acrylic nails polish away. If the acrylic layer becomes hard while filing, use an acetone-soaked cotton wool to soften it.

    • Moisturize your hands. Acetone makes your skin extremely dry. Wash

    the acetone off with soap and water. After that, pat your skin dry and add lotion or moisturizer to soften it.

    Using dental floss

    Necessary tools:

    • Dental floss
    • Nail clippers
    • Buff
    • Cuticle pusher
    • Hand cream moisturizer or vaseline
    • Nail file

    Steps:

    • Find a partner. This method of removing acrylic nails requires a person to help you, as it requires both hands to pull the dental floss underneath the powder nail.
    • Pry up the bottom edge of your acrylic nails. Gently slip in and lift up the entire bottom edge of the nail bed using a cuticle pusher. Do it slowly and control because you do not want to hurt your nails bed.

    • Ask your friend to help you insert the dental floss into the bottom of the nail you just pry. Your friend should sit opposite you, pull the piece of the dental floss placed under the nail edge that has just been pry, with both hands firmly grasping the ends of the thread.
    • Your friend can start by pulling the floss back and forth under the nail powder. Make sure that your friend slides the thread while pulling it forward. This will cause the nail powder to gradually peel off. Continue to repeat this sawing motion until the acrylic nails have peeled off and are completely separated from your natural nail. Tell your partner not to pull the thread too fast. You don’t want your natural nails to wear off with your acrylic nails.

    • Use a buff and nail file to reshape your nails. You can use buff and nail files to re-file the nail shape as well as remove any remaining acrylic nail polish.
    • Moisturize your hands. During the process, your nails may be slightly damaged. You can use hand moisturizer to soften and heal your nails
    • How to remove acrylic nails at salon

    Removing acrylic nails at home seems to have more risk because you do not have enough equipment or experience doing it. Besides that, the cost of tools you buy to remove acrylic nails can be much higher when compared to going to a nail salon. Rachel’s Nails salon has the finest skills and tools to remove your nails precisely.

    The first step that my salon would usually take is to soak your nails in acetone. Since acrylic nails are composed of some chemicals, acetone (or something similar) will be required to get through the strong, protective coating during removal. When soaking off, a tiny pad will be soaked in polish remover, placed over the nail, and gently wrapped. Soaking will be done very carefully so as not to damage your nail bed.

    Filing is usually the next step. Our salon has special files and nail drill for removing acrylic nails. This will help to remove all the acrylic coating on top of your nails. They are perfectly suited for this type of work and can quickly remove the softened acrylic.

    Last but not least, only at Rachel’s Nails, we provide special nail coating polish for customers. After removing the acrylics from your nails, we will paint you the polish to top your nails. This ensures that your nails will be strong and safe after the removal.

    The whole process takes about 25 to 35 minutes so it is perfect for those who do not have time and tools to remove acrylic nails at home. We have talented manicurists and special equipment so we will always make sure that nail removal is smooth and safe. With only from £10, you can get the best nail removal service.

    1. Some advice for you
    • Do not pour acetone nail cleaning solution into a plastic bowl. It will decompose and damage the bowl and acetone may spill outside.
    • If you do not want to use acetone, there are acetone-free nail polish remover which is easy to buy and a perfect replacement for the normal acetone nail cleaning solution.
    • You can buy a specialized acrylic powder nail removal kit at the pharmacy.
    • Some people often think that it is unnecessary going to a nail salon just for nail removal. At Rachel’s Nails, we always recommend customers going to our salon to remove acrylic nails because improperly removing the acrylic makes it even more damaged and messy.
    • You should remove your acrylic nails after maximum 2 months in order not to encounter risks.
    • You should remove acrylic nails at home only if you have proper tools and your nails are strong enough.

    Warning

    • If removing the nail causes pain or the acrylic nails remains stuck after repeating the process, you should stop and go to the nail salon for advice.
    • Always keep acetone away from fire or high heat sources as it is highly flammable.
    • Using acrylic powder nails carries the risk of infection as the space between the natural nails and the powdered nails increases. This allows bacteria to enter. If your nails become thick and discolored, consult your personal doctor or dermatologist.
    • Pulling off acrylic nails, no matter how tempting it may seem, can cause harm to your nails. As a result, never rip or pull your acrylic nails off.

    Conclusion

    That’s all about removing acrylic nails both at the nail salon and at home.

    To remove acrylics, Rachel’s Nails uses professional acetone, special tools and provides the nail treatment coating on top of your nails after the removal. At Rachel’s Nails, we provide not only manicure service but also pedicure and beauty treatments. Everytime you go to our nail salon, we will serve you with the best services by talented nail technicians. We want to make sure that when customers come to Rachel’s Nails salon, they can have the ultimate experience. Our price is affordable to everyone. Besides that, we have high quality products and services. You can visit us at 12a Norcot Road, Reading, UK. Here is our website https://rachelsnails.co.uk/ and you can read our blogs to get more information about nails.

    Remove acrylic nails at home is quite simple, all you need to have is proper tools and make sure that you follow step-by-step instructions. If any unexpected problems happen, feel free to come to our nail salon or nearest health facilities for help.

    We hope that you can choose a suitable way to remove your acrylic nails safely and easily.

  • How To Remove Gel Nails – Effective And Simple

    How To Remove Gel Nails – Effective And Simple

    Currently, gel nail polish is being favored by many women, because of its high durability. Moreover, it has more beautiful colors and designs than regular nail polish. With a special gel composition, ordinary nail removers cannot remove the gel color on the nails. Instead, every time you want to remove the old nail color, you often have to go to a specialized nail salon to be able to remove the gel layer. At Rachel’s Nails, we have advanced techniques to carefully remove gel nails. For your convenience, we will show you how to remove gel nails: at home and at our salon.

    How to remove gel nails at home

    Most people go to a salon to have their nails removed by a manicurist, but you can do this yourself at home. Today, we will show you 2 ways about how to remove gel nails easily without going to the salon: soak gel nails in acetone and peel off gel nails.

    1.1. Soak gel nails in acetone 

    Necessary tools:

    • Nail file
    • Buff
    • Cotton ball
    • Acetone nail cleaning solution
    • Aluminum foil
    • Vaseline and hand cream moisturizer
    • Bowl

    Steps:

    STEP 1: Pour acetone into a bowl.

    Acetone is a chemical that reacts with gel nails, helping to reduce stickiness and cause gel nails to peel off from their natural nails. Acetone is commonly found in nail polish removers. To remove gel nails, however, you should use pure acetone at a greater concentration.

    • Wrap plastic wrap or foil over the acetone bowl. We recommend using non-plastic bowl because acetone can decompose and damage the plastic bowl.
    • Warm the acetone by placing it in a bigger bowl of warm water. Remove after around 3-5 minutes to avoid the acetone from becoming too hot. Because acetone is flammable, proceed with caution. Do not leave acetone near direct heat sources.

    STEP 2: Protect your skin with moisturizing cream. 

    Acetone can cause skin to become dry and damaged, therefore use a moisturizing cream to preserve it. If you don’t have a pure moisturizing cream, a lotion or vaseline is a perfect substitution.

    • Dip a cotton swab in moisturizing cream and apply to the edges of the nail and skin. You should apply from the fingertips to just below your nails.

    • Do not apply too much cream on nails surface because acetone cannot dissolve the gel.

    STEP 3: Wrap your nails in acetone.

    Dip a cotton ball in acetone until completely absorbed, then place it on the nail. Then, use foil to secure the cotton ball. Soak nails in acetone for about 30 minutes.

    How to remove gel nails

    If acetone doesn’t irritate your skin, you can soak your nails directly in the bowl instead of using cotton balls and foil. Make sure not to soak nails directly in acetone for more than 30 minutes.

    STEP 4: Remove foil and cotton balls.

    Remove the foil and cotton ball from one nail first. The gel should fall off easily when you wipe it with a cotton ball. If the gel falls off easily, you can repeat the process with the remaining nails.

    • Gel nails can be peeled backwards to make the gel easier to peel off.
    • If the gel on the first finger still sticks, you need to replace the cotton ball soaked in acetone. Repeat the process for 10 minutes.

    Continue until the gel nail is soft and can be removed from the nail. If this method doesn’t work within an hour, the adhesive gel is probably resistant to acetone and you need to find another way.

    STEP 5: Nourish your nails with moisturizer.

    Wash off the acetone and then use a file to file the natural nail. Use a nail buff to help remove rough corners. Moisturize your nails and hands with lotion or hand cream.

    • File only in one direction so as not to damage the nail. Avoid filing back and forth like a wood saw.
    • Acetone can dry out nails. Therefore, you need to keep your nails carefully for a few days. It is recommended to wait about 1 week before applying a new gel nail.

    1.2. Peel off gel nails

    Necessary tools:

    • Cuticle stick
    • Tweezers
    • Nail file
    • Buff
    • Vaseline and hand cream moisturizer

    Steps:

    STEP 1: Wait until the gel is almost peeled off.

    The gel usually breaks off after 1-2 weeks and it’s best to wait until the gel starts to peel off on its own to reduce damage to the nail surface.

    STEP 2: Insert the cuticle stick under the surface of the gel.

    Gently insert the stick under the gel, until the gel around the edge of the nail is slightly raised. Do not push too hard under the nail gel to avoid damaging the natural nail.

    STEP 3: Peel off the gel. 

    Use your fingers or tweezers to hold the edge of the gel nail and then peel it back. Repeat with each nail until the gel nail is completely removed. You can apply coconut oil or other types of oil on top to protect your nails.

    • Do not rip off gel nails. Vigorous tearing can pull the natural nail layer.
    • If the hard gel does not peel off, you should consider another removal method.

    STEP 4: Nourish your nails with moisturizer. 

    Use a nail buff and nail file to help remove rough corners. Moisturize your nails and hands with lotion or hand cream. 

    How to remove gel nails at salon

    How to remove gel nails at home appears to be more dangerous because you lack the necessary tools and skill. Aside from that, the cost of equipment to remove gel nails might be substantially higher than going to a nail salon. At Rachel’s Nails, we provide ultimate service to carefully removing your nails.

    My salon’s standard process is to soak your nails in acetone first. Because gel nails contain chemicals, acetone (or something similar) will be required during removal to remove the tough, protective coating. When removing gel polish, a small pad absorbed in polish remover is placed over the nails.

    The next step is to file the gel nails. When removing it, our salon has special files and a nail pusher. This will help to remove all the gel coating on top of your nails easier.

    Last but not least, Rachel’s Nails is the place where consumers may get special nail coating polish. After we remove the gel from your nails, we will apply the polish to the top of your nails. This ensures that your nails are strong and safe after the gel has been removed.

    The entire procedure takes about 15 to 25 minutes, making it ideal for those who do not have the time or tools to remove gel nails at home. We have skilled manicurists and specialized equipment, so we can always make sure that nail removal is painless and safe. You may get the greatest nail removal service from only £8.

    Some advice for you about how to remove gel nails

    • If you are patient enough, just let the nail grow out and then clip the nail

    regularly to remove the gel-coated part, until the gel nail is completely removed. This process takes longer but is the most natural and safest way to remove gel nails.

    • After removing the gel nails, the natural nails will be very weak and

    sensitive to chemicals and cleaning products. Therefore, you should wear protective gloves during cleaning for several weeks.

    • Always remember to moisturize your hands and you should not have your

    gel nails done right after removing the old ones. It may damage the nail bed. 

    Warning 

    • Peel off gel nails can cause damage to your natural nails.
    • Avoid inhaling the smell of acetone while preparing and soaking your nails. It is best to apply this method in a well-ventilated area.
    • Acetone is highly flammable. Never heat acetone in the microwave or on the stove. Be careful when heating acetone with warm water.

    Some information about our nails salon

    Rachel’s Nails offer not only manicures but also pedicures and beauty treatments. Our utilities are meticulously prepared to provide you with the greatest services. We have talented manicurists and a wide selection of options for customers. When compared to other sites, the pricing and quality of the services here are really reasonable. Every day, we strive to improve so that we can provide the greatest service to our clients.

    We want to make sure that when customers come to us, they get exactly what they desire. Moreover, we have a free parking spot right in front of the salon, ultra free wifi and free drinks for customers. Our location is at 12a Norcot Road, Reading, UK. Customers can visit our website named https://rachelsnails.co.uk/, and you may read our blogs to get more about nails. 

    Conclusion

    We hope that all the information that we provide to you can help you with the issue: how to remove gel nails at home and at our salon.

    It is quite simple to remove gel nails at home. All you need are the necessary tools and you should follow the step-by-step instructions. If any unexpected problems arise, please feel free to visit our nail salon or the nearest health facility for assistance.

    At Rachel’s Nails, we remove gel nails with acetone and specific tools, and then apply a nail treatment coating on top of your nails. This protects your nails from being damaged after the removal. We guarantee that you will always have perfect nails when leaving our salon.

    To all the girls and women, we believe that after reading this article, removing gel nails will no longer be a tough challenge to you.

  • How To Grow Your Nails Strong And Long

    How To Grow Your Nails Strong And Long

    The process of growing long and strong nails is a multi-step one. You may grow your nails to any length you choose as long as you take excellent care of them. You should begin by eliminating unhealthy nail habits. Following that, taking the right vitamins and correctly manicuring your nails can help you answer the question: how to grow your nails?

    Getting Rid of Bad Habits

    Stop biting your nails.

    Biting your nails is bad for your health. Although it is a common anxious behavior for many people, it can result in bacterial skin infections on your hands and in your mouth. If you have dry or flaky skin around your nail beds, clip it away rather than bite it off. Here is our article about how to stop biting your nails.

    • Try keeping your nails nicely manicured or applying nail art to make you less likely to bite.
    • When you’re bored, chew gum. If you don’t have any gum, try to play a tiny ball, smartphone or do something else.
    • You should not bite the skin surrounding your nails. You may persuade yourself that by simply chewing the skin surrounding your nails, you are not causing any harm to the nail. This is untrue; the extra moisture from saliva will only weaken your nails and make them more prone to breaking.
    • Pick one nail a week that you will not bite. To wean yourself off the habit, gradually add more “no-bite” nails.
    • If your nail biting is severe, talk to a therapist about your anxiety or another issue that may be driving you to bite your nails.

    Wearing acrylics and gels is no longer necessary. 

    When acrylic or gel nails are removed too quickly, they become dry, brittle, and unlikely to grow again. Because it happens with moist nail-beds, even effective removal might cause harm to your nails. Your nail beds are most sensitive when they are moist.

    • If you choose to obtain gel or artificial nails, alternate between the two. In between gel or acrylic manicures, get a classic manicure.

    Stop picking at your cracked nail paint. 

    Picking at your polish typically results in the removal of the top layer of your nail bed. This creates a shaky base for your nails.

    Stop ignoring base and top coats. 

    When you’re in a rush and want your polish to dry quickly, it’s tempting to forgo base and top coats. However, if you skip these, you will damage your nails. They prevent your nails from discoloration and help the polish cling to your nails, resulting in less chipping. If it chips less, you’re less inclined to pick at it and harm your nails more.

    Stop utilizing your nails as a tool. 

    Peeling labels, scraping wax, or unfastening a key ring can all easily harm or break your nails. You may not even be aware that you are doing it, but if you want to maintain good and strong nails, you must begin to notice. Also, avoid immersing your nails in water for too long. This might soften the nail, causing it to become weak and flexible.

    • Slowing down is the greatest method to put a halt to this. Have scissors or another tool on hand to help you open, scrape, or peel anything you need during the day. Avoid doing anything that might cause your nail to flex. To avoid chewing your nails, keep clear nail painton them.

    Getting nail-growing nutrients.

    Take lots of Vitamin H. (biotin). 

    Biotin helps to develop and strengthen the nails, hair, and skin. Aim for 30 to 40 micrograms per day, either through diet or supplements. Biotin is high in whole grains, mushrooms, bananas, salmon, and avocado.

    Consume folic acid-containing foods. 

    Folic acid, often known as Vitamin B9, protects your nerve cells and maintains your red blood cells healthy. It is the finest vitamin for nail development, and it is difficult to consume too much because your body excretes excess naturally. Folic acid levels are high in fish, red meat, cheese, and fortified soy products.

    Get vitamin A. 

    Vitamin A will aid in the strengthening of your nails. The daily suggested dosage is 700 to 900 micrograms per day. Vitamin A is plentiful in sweet potatoes, carrots, squash, and leafy greens.

    Consume lots of vitamin C. 

    Vitamin C is best recognized for its immune-boosting properties. This indicates that it aids in the recuperation of the body. This recovery aids in the growth and strength of the nails. Vitamin C is rich in oranges, kale, strawberries, and bell peppers.

    Get manicure properly

    Shape and care for your nail base.

    You must begin with a suitable basis if you want to grow your nails long and strong. To begin, you must have clean and healthy nails. Keep your cuticles clipped and file them into shape.

    • They must be properly filed. Begin from the outside edge and work your way toward the middle. Your nails will become weaker if you go back and forth in a repeated motion.

    Take good care of your cuticles. 

    To soften your cuticles, soak your nails in warm water for 5 minutes. Do this up to four times each week. To remove the dead cuticle skin, use a cuticle remover to your nails and press the dead skin back with a cuticle stick. Rinse the remover and dirt away (Recommended to do once a month).

    • After pulling your cuticles back, apply hyaluronic acid to and around them for enhanced cuticle health.
    • Maintain your nails’ moisture levels. Using a moisturizer around your cuticles will help you avoid hangnails and damaged nails.

    Strengthening therapies should be used. 

    There are a variety of strengthening therapies available. Apply the one that matches your budget and schedule once you’ve formed a suitable base and properly cared for your cuticles.

    • Serums are costly, but they frequently offer the quickest and greatest effects in nail strengthening.
    • Creams are ideal for daily usage. Intensive protein treatments are available in the form of a cream that you apply to your nails in the morning and before going to bed at night.
    • The use of a strengthening polish will assist to protect your nails from peeling. It is incredibly inexpensive and simple to use.
    • To protect your nails, apply base or top coats and nail hardeners.
    • Keep in mind that using nail hardeners or anything similar increases the chances of your nails snapping or cracking, which may be unpleasant.

    Homemade remedies to grow your nails 

    Lemon juice

    Lemon juice may assist to lighten and eliminate stains from your nails, and the vitamin C encourages stronger growth. Allow to dry after swiping lemon juice over each nail with a cotton swab. A slice of lemon might also be used straight on the nail. Do this twice a week, then apply a thick moisturizer.

    You may also combine a few drops of lemon juice with 2 tablespoons of olive oil in a cup and microwave for 15 seconds until warm to make a nail mask that can be massaged into your nails and left for 30 minutes, or overnight if possible, for optimum effect.

    Coconut oil 

    Coconut oil is extremely moisturizing and can help strengthen and soften your nails and cuticles. It also has anti-fungal qualities, which is helpful if you have a tendency to have nail infections.

    Warm coconut oil in the microwave for 20 seconds and massage into the cuticles before going to bed for a nutritious treatment. Wear a pair of thin cotton gloves overnight to keep in the treatment.

    Garlic oil

    Garlic contains selenium, which promotes nail development. You may either massage your fingernails with sliced garlic or, if that is too strong for you, create your own garlic oil to use as a nail mask.

    To make this, sauté chopped or minced garlic in a skillet with olive oil for 10 minutes, being careful not to let the oil boil or smoke. Allow the oil to cool before straining it into a glass container, removing the garlic bits. Every night, rub this oil into your nails and cuticles before washing off in the morning. Keep in mind that massage increases blood flow, which aids in the delivery of nutrients from your bloodstream to your nails.

    Honey 

    Honey can help maintain your nails and cuticles healthy and supple by preventing bacterial and fungal development. Combine the moisturizing qualities of honey with those of lemon juice to make a honey and lemon nail mask by combining 2 teaspoons of honey with a few drops of lemon juice and rubbing into your nails for 15-20 minutes. Rinse well, and you should have brighter nails, softer cuticles, and stronger nails over time if used frequently.

    Frequently asked questions about how to grow nails

    Q: What causes my fingernails to be brittle?

    A: The use of gel or acrylic nail polish might cause your nails to become brittle. You may also weaken them by immersing them in water or exposing them to dish soap.

    Q: Can a balanced diet and vitamins aid in the treatment of dry and brittle nails?

    A: Daily biotin supplementation can be beneficial. Taking an oral silicone supplement might also aid in the strengthening of your nails. Also, make sure you’re getting enough protein. Nails are composed of a protein-like substance called keratin, therefore it’s important that you obtain enough protein in your diet.

    Q: How to grow your nails faster?

    A: As we mentioned above, having a healthy diet, using nail treatments and doing some remedies at home to have best results. Be patient, good things take time.

    Summary

    Your nails are an indicator of your general health. If you want strong, fast-growing, healthy nails, you must eat a healthy diet. This includes eating a well-balanced diet rich in fresh fruits and vegetables, lean protein sources, adequate carbohydrates, and healthy fats.

    However, occasionally nails require a little assistance in becoming healthier and stronger. This is when home remedies might come in handy. Remember, you can’t make your nails grow quicker on their own. However, if you care for them, they will grow stronger and last longer, making them less prone to fracture.

    We hope this article can give you some solutions for the problem: how to grow your nails fast and easy. Take everything into consideration before doing it because everything takes time including growing your nails.

  • How To Take Off Fake Nails: 2 Easy Ways That Everyone Can Do

    How To Take Off Fake Nails: 2 Easy Ways That Everyone Can Do

    False nails look wonderful, but they might be difficult to remove if you haven’t done it before. You may either go to a salon or do it yourself at home to remove the nail adhesive. After soaking your nails in soapy water, carefully file them off if you have glue-on nails or tips.

    Then, using a nail buffer and acetone, remove any remaining adhesive. To glued-on nails, just use acetone and file away any leftover gluey residue. After that, you’ll have natural nails that are strong and healthy.

    How To Take Off Fake Nails: 2 Easy Ways That Everyone Can Do

    How to take off fake nails without using acetone

    Soak your nails for 15 minutes in warm, soapy water. Fill a bowl or sink basin halfway with warm water and a little amount of mild hand soap. Place your hands in the bowl or basin so that your glue-on nails are completely immersed, and let them there for about 15 minutes.

    Soap and water will seep into the nail adhesive and soften it, making the nails simpler to remove.

    To soften the glue, soak your nails in a little pure acetone, but keep in mind that acetone is considerably harder on your skin, nails, and cuticles than soap and water.

    Alternatively, soften your nail adhesive by smearing a few drops of cuticle oil on each fake nail and allowing it to soak in for a few seconds.

    Once the adhesive has loosened, gently pry the artificial nails off. Look for a location where the nail has already begun to detach and gently pull the nail out from there. If you can’t find a loose area, gently work the tip of a nail file beneath the fake nail’s edges to loosen it.

    If the nail does not come out easily, do not try to rip it off. If you need to soften the glue a few more minutes, soak the nail in soapy water for a few minutes longer.

    Excess glued nails should be gently filed away using a nail buffer. Once the artificial nails have been removed and your natural nails have dried slightly, use the “buff” side of a nail buffer block to buff away the majority of the adhesive. When you’re confident that you’ve eliminated the majority of the adhesive, rinse the powder away with water.

    After buffing your nails, you may use the “shine” side of the buffer to polish them.

    Using acetone, remove any residual glue. To remove any remaining traces of nail glue, soak a cotton ball in acetone and massage it on each fingernail. Wash your hands with soap and water to remove any acetone residue from your hands and nails.

    Apply a little amount of nail moisturizer or cuticle oil if your nails feel dry after rubbing them with acetone.

    How to take off fake nails with an acetone soak

    Cut your fake nails as short as possible. Acrylic nails are composed of materials that attach directly to your natural nails rather than being glued on. Trim the artificial nails to a short but comfortable length using a pair of nail scissors or clippers, taking care not to cut any of your real nails. Because there would be less debris to dissolve, the remainder of the removal process will be sped up.

    Trimming down into your nail bed will be unpleasant.

    This method is applicable to both SNS (dipping powder nails) and acrylic nails.

    Remove the fake nail’s shiny surface using a file. If the artificial nails are still connected to your natural nails, remove the glossy surface using a nail file. Back and forth across your nails with the file until the shiny sheen is gone and the nails look matte. Make an effort to massage each area of the nail equally. This will expedite and improve the removal procedure.

    Stop filing that place if you notice any of your natural nails showing through under the artificial nails. You risk harming your natural nails if you continue to file.

    Wipe any dust away with a clean, dry cloth or cotton pad. A microfiber cloth is a cheap and effective alternative, but any clean cloth will do. Remove any dust from your nails to allow the acetone to more easily penetrate the leftover acrylic.

    Apply petroleum jelly or oil cuticles to the area of skin surrounding your nails. This will shield your skin from the acetone. Apply a small coating to your nail beds as well as the skin underneath and around your nails.

    Apply petroleum jelly or oil cuticles if you have dry or sensitive skin.

    Wrap a cotton ball soaked in acetone around each nail on one hand. If you have acetone in a dripper container, carefully squeeze it onto the cotton pads. If the acetone is in a normal container, pour it into a small disposable dish before dipping the cotton pads into it. Each wet cotton pad should be placed over one of your nails.

    Cotton balls can be used instead of cotton pads if you don’t have any.

    Acetone and cotton pads can be purchased at a pharmacy or a supermarket. If you have sensitive skin, use an acetone-based nail paint remover that is specially formulated for it.

    Acetone fumes may be hazardous, therefore always use it in well-ventilated places.

    Wrap an aluminum foil strip around each nail and cotton pad. Tear out a piece of aluminum foil about 1 inch (2.5 cm) by 2 inches (5.1 cm). Make sure the cotton pad is in place before wrapping the foil around the nail and cotton pad.

    The metal foil will help to retain heat and moisture, preventing the acetone from evaporating before the glue has a chance to soften. This expedites the removal procedure.

    Repeat the technique for all of the nails on one hand before moving on to the other. If you find it difficult to work on your opposite hand while your other hand is still soaking, look for the assistance of a friend or wait until the foil and cotton pads have been removed before attempting to begin the second hand.

    After 20 minutes, remove the foil and pads. Set a timer for 20 minutes and allow the acetone to do its thing. Remove the cotton pads from the foil that has been wrapped around your nails. You should see that the adhesive has dissolved and the fake nails have softened.

    Leave the foil and pads on for another 15 minutes if the first nail is still coated in adhesive or the artificial nails are still securely in place.

    Avoid putting used acetone pads on wooden or plastic surfaces because the chemicals will harm the surface.

    With a tea towel, remove the spongy fake nails. Clean the dissolved debris from the fake nails with a clean dish towel. Apply pressure to the tea towel when cleaning the nails, but stop if your natural nails begin to hurt.

    If the fake nails do not come out easily, replace the acetone-soaked cotton balls and foil.

    Buff away any extra glue or paint with a nail file. Don’t be concerned about filing your entire nail. Instead, concentrate on the places where there are glue residues. You don’t want to file your natural nails, so try not to push too hard.

    A nail file may be purchased from a drugstore. It’s worth noting that some retailers will refer to them as nail buffers.

    How to treat your nails after taking off fake nails

    Hands should be washed with warm, soapy water. If you leave acetone on your skin, it will dry it out, so wash it off with warm water and natural soap. A natural soap will aid in the retention of your skin’s natural oils.

    If you just have normal soap at home, use that.

    Removing nail adhesive from your nails might cause your hands to get dry. To restore the natural moisture of your nails, cuticles, and hands, rub natural oil freely over them.

    Natural nail moisturizers such as almond oil and olive oil are effective. These may be purchased from a natural health and beauty store or a drugstore.

    Allow your nails to rest in between manicures. If you often use artificial nails, your real nails will benefit from a rest between treatments. After removing the fake nails, let your natural nails a few days to a week to heal before applying new false nails or paint.

    Try taking a week off between manicures every 8 weeks.

    Consider putting fake nails without adhesive the next time to see if it works better for you than having to remove nail glue.

    Frequently asked questions about how to take off fake nails

    Q: How do you get rid of remaining nail glue?

    A: Clumps of nail adhesive can be removed by buffing. Acetone can be used to eliminate small quantities of residue.

    Q: If I don’t want to use acetone, how can I remove the glue off my nails?

    A: If you don’t want to soak your nail tips in acetone, you can carefully file the glued-nails away.

    Q: No matter how hard I try, I can’t get my artificial nails off, and I’m too busy to go to a nail parlor. What am I supposed to do?

    A: Apply pure acetone to cotton balls, apply a wet cotton ball to the nail, and press it firmly against the acrylic, on the area where it has stuck to your natural nail, using tin foil to keep it in place (this prevents you from having to handle the acetone a lot). Use tin foil to retain an acetone-soaked cotton ball or two on each nail while the acetone eats away at the acrylic nail and adhesive. If you can not do it by yourself at home, you should go to the nail salon so that the manicurists can help you with this process.

    Summary

    That’s all there is to it when it comes to how to take off fake nails easily at home.

    If taking off fake nails is too difficult, you can come to Rachel’s Nails for the removal. We remove false with professional acetone and specific equipment, and then apply a nail treatment coating on top of your nails. Rachel’s Nails offers not only manicures but also pedicures and cosmetic treatments. Every time you visit our nail salon, you will be served by expert nail technicians. We want to make sure that when consumers visit Rachel’s Nails salon, they get the best experience possible. Everyone can afford our prices. Aside from that, we provide high-quality products and services. We are located at 12a Norcot Road, Reading, UK. Here is our website https://rachelsnails.co.uk/ and you can read our blogs to get more information about nails.

    It is quite simple to remove fake nails at home; all you need are the right equipment and to follow the step-by-step instructions. If any unforeseen difficulties arise, please feel free to visit our nail salon or the nearest health facility for assistance.

    We hope you may find a suitable method about how to take off fake nails safely and conveniently at home.


  • How To Do Gel Nails At Home – Simple Tutorials For Everyone

    How To Do Gel Nails At Home – Simple Tutorials For Everyone

    When you apply gel nails, you get the strength of artificial nails with the look of natural nails. When you apply gel nails, you do not encounter the harsh fumes that you get when you apply acrylics. Under UV light, the gel hardens. Each layer must solidify for two to three minutes under this light. This forms a chemical connection between the gel and your nail.

    Prepare tools to learn how to do gel polish at home

    Gel polish will help your nails to have the same durability as using acrylic paint while still looking very natural. Moreover, when applying gel nail polish, you will avoid the strong smell of acrylic paint. That’s why many people prefer gel polish nowadays. To get started on how to do gel polish at home, you need to prepare some of the following necessary tools:

    The basic gel polish set includes: primer, gel polish, top coat polish, then choose the color you like the most. Here are some tips on choosing the paint color that we want to show you in order to have the right color: with neutral skin color (light skin color or yellow skin), it is quite easy to choose because it suits most paint colors, but if you have dark skin, you should choose colors in light tones.

    Nail file and nail clippers

    Nail file, clippers are essential steps in performing a DIY manicure. Most of the time, the surface of your nails isn’t smooth enough to go without one. A nail file’s aim is to prepare your nails to adhere to gel polish not just adequately, but also for a longer period of time. Nail clippers are used for trimming your nails in order that you can get proper nail shape.

    How To Do Gel Nails At Home - Simple Tutorials For Everyone

    Q-tips, gel polish remover or acetone to clean excess polish

    In the process of getting your nails done at home, you may have some unexpected problems such as having excess polish on your skin. So Q-tips and acetone are good solutions for these.

    UV lamp to dry paint

    You will be unable to cure your gel nails without a curing lamp that produces UV radiation. It is possible to cure your DIY gel paint manicure naturally by sunning your nails and taking advantage of the sun’s UV rays, but it is not the most efficient technique because you would have to wait for the weather to be favorable. In this case, a UV lamp or LED curing lamp is the best option. However, we recommend using an LED curing lamp because it emits less UV light and dries the gel polish the fastest.

    Now let’s start with the gel polish process. 

    We believe that after reading this article, you will understand how to have the very standard, beautiful gel polish that is no different from going to get your nails done in a salon.

    Step 1: Cut excess cuticle

    First of all, in order to have the most beautiful nails, we need to cut the excess skin around the nails, this helps the paint not to be easily smeared out, but also helps the nails to be neater and more beautiful. You can use a cuticle stick to push any skin away from your nail plate.

    However, if you do it yourself, it will be a bit difficult, you can ask someone else to help cut the cuticle, or your hands do not have too much excess skin, you can skip this step. Be careful not to bleed when pushing and trimming it.

    Step 2: File and shape your nails

    Before cutting your nails, decide how you want to shape the nail. Trim the regular nail style and then file the tip. Finally, complete the styling by smoothing the nail surface with a polishing tool or nail file. You can also create round, square, pointed, almond or oval nails. Here is our instruction about how to file and shape your nails properly.

    Step 3: Apply a layer of primer on the nail surface

    This is an important step to help protect the nail and create a better bond with the gel polish. You know, nail polish often contains chemicals, this step will help protect nails from the chemicals from gel paint.

    Before proceeding, you often shake the primer paint bottle well, then take a little of it and apply a thin layer on your fingers. Apply your base coat in a very thin layer to your nails. Gel is applied in a much thinner layer than regular nail polish. When applying your base layer, take care not to get the gel on your fingertips.

    Allow your base layer to dry under the UV lamps for 20-30 seconds, twice as long as the manufacturer recommends. This is enough for the primer to dry.

    Step 4: Paint 2 thin layers of color

    When the base paint is completely dry, let’s start painting. Just like the base paint, before painting, shake the bottle of gel polish of the color you chose previously. 2 thin layers of the color gel should be applied. It will most likely appear streaky, but this is typical for the initial layer. Make careful to paint over the tip of your nail as well as the surface with these colorful layers. This prevents the gel from curling back off your nail.

    Step 5: Paint the top coat

    Applying the top coat guarantees that the cover you’re about to apply preserves all of your nail work. While gently sealing your nail tips, apply a small coating of the top coat over the colored gel paint. It’s a simple tip for extending the life of your nail polish. After that, smooth the layer over and cure using the LED cure lamp you previously used.

    Step 6: Take off the tacky. 

    After curing the top gel, some gel techniques leave a tacky, sticky coating on and around your nails. If this is the case, just wipe the tacky using a cotton ball soaked in acetone or nail remover. To finish your gel manicure, massage a cuticle oil into the area at the base of your nail. If your gel nails get dull after a few days, use a buffer to smooth out the top layer of clear coat, then clean your nails and reapply another clear top coat to restore the shine.

    How to remove gel nails after

    Step 1: Remove the top layer using a file. 

    To remove your gel nails, first file away the top layer of the gel. This will dull the sheen. Only once the shine has been gone can you proceed with removing the gel.

    • Avoid removing the polish off your nails. This might remove layers of your nail, leaving them brittle and dry.

    Step 2: Soak your cotton ball in acetone or nail remover solution

    If you do not use acetone or nail remover, the gel will not come off. Acetone is classified into two types: normal-concentration acetone and super-concentrated acetone. We’re talking about the ultra-concentrated version here. Take ten cotton balls and soak them in acetone. Cotton balls should be large enough to cover the entire nail.

    • Because acetone is a strong chemical, use caution while working with it. Also, bear in mind that acetone is highly drying to your nails, so they may get brittle as a result. The obvious disadvantage of this method is that your skin might get red, dry, and damaged more readily than with normal acetone, at the price of time.
    • If speed is important, 100 percent acetone is the best option since it dissolves gel nail polish in half the time of ordinary acetone nail paint remover.

    Step 3: Wrap a piece of tin foil over your fingertips. 

    Place one of the cotton balls on your nail, covering it completely. Wrap the nail and the tip of your finger with tin foil while the cotton ball is still in place. Apply this to the rest of your nails.

    • It is best to perform this with one hand at a time. Wrapping the second hand with foil-covered fingers is quite tough.

    Step 4: Remain them for a few minutes before removing one at a time. 

    Allow the foil to remain wrapped for 15 minutes. Keep it tight and don’t try to open it to see whether it’s functioning. Remove the wrapping one nail at a time after 15 minutes. The gel will have begun to flake away. Push the gel off your nail using a cuticle stick.

    • If you can’t get rid of the gel, just by using the cuticle stick or re-wrap your nails with an acetone-soaked cotton ball and foil. Allow for another 15 minutes before attempting again.

    Step 5: Finally, apply cuticle oil. 

    You should finish with cuticle oil once more. Cuticle oil should be massaged into the area surrounding the base of your nails.

    Apply cuticle oil to the surface of your nails and buff them with a nail buffer if they are tough.

    Frequently asked question about how to do gel nails at home

    Q: Do I lightly rub to remove the sticky coating of gel builder between layers of gel?

    A: You do not need to remove the gel polish before applying the top coat. You should only remove it once you’ve done the manicure and applied the coating.

    Q: How long do gel nails last?

    A: They should stay on for around three weeks, depending on the quality of the labor put into the nails or the quality of the materials utilized. Some gel nails can last up to three weeks, but you can’t really guarantee more than two. It also depends on the length of your nails and what you do on a daily basis, such as cleaning or dishwashing, whether they chip or peel off.

    Summary

    Doing gel nails at home is similar to going to a nail salon. As long as you have the proper equipment and the patience to learn, you should have a good time doing this.

    Because each step we stated is critical, you should complete all of them without missing any of them. Once again, the greatest gel polish shines through. We have fantastic alternatives for your at-home gel nail manicure, so don’t forget to check out our gel polish collections.

    We hope that you find this article helpful and you can follow the tutorial about how to do gel nails at home quick and easy.

  • How To Do Ombre Nails At Home, Easy Tutorials

    How To Do Ombre Nails At Home, Easy Tutorials

    Ombré nails (like ombré hair) are a style of manicure that creates a color gradient. A bright hue on the top of the nail fades into a darker color at the tip. It may take some time and effort to achieve the ideal ombré effect, but there is plenty of creativity to make your one-of-a-kind ombré effect nails. Here are 2 simple tutorials about how to do ombre nails at home.

    What are ombre nails?

    Ombre is a term derived from the French word “ombrer”. This is not the name of a certain color, but the concept of the change in shade, the intensity of a color, also known as a transition.

    In the past few years, ombre color has returned in hairdressing, makeup and trending techniques. Then spread to the Nail field. This is the beginning of one of the most popular nail trends today.

    Why are ombre nails becoming more trendy recently?

    More than just a color transition from dark to light, the ombre pattern in the nail really brings top-notch art to the nails.

    Creativity above all boundaries

    Instead of just using a boring background color, nail technicians can break all the rules to unleash their creativity and mix colors.

    Nail ombre gives the women a mysterious, enchanting and colorful look. Thanks to the unlimited color creativity, ombre nail styles are extremely diverse and constantly changing.

    Diversity of customers

    Nail ombre is suitable for all ages from young people to the elderly. Bright, eye-catching colors will be the perfect choice for young people.

    As for the elderly, deep colors will be preferred.

    Suitable for all situations

    Thanks to the simple design, the ombre nail is easy to combine with different outfits and accessories.

    Therefore, this nail style is often used by women in many different situations such as birthday parties, proms, weddings, etc.

    How to do ombre nails by using a sponge

    Step 1: Remove any extra cuticle.

    To begin, in order to have the most beautiful nails, we must trim the extra skin surrounding the nails. This not only prevents the paint from smearing out, but also makes the nails neater and more attractive. To remove any skin from your nail plate, use a cuticle stick.

    However, if you do it alone, it will be tough; you may ask someone else to assist you in cutting the cuticle, or if your hands do not have too much additional skin, you can avoid this step. When pressing and cutting it, take care not to bleed.

    Step 2: Shape and file your nails

    Decide how you want to shape your nails before cutting them. File the tip after trimming the usual nail style. Finally, smooth the nail surface with a polishing tool or nail file to complete the style. You may also make nails that are round, square, pointed, almond, or oval. Here is how to correctly file and shape your nails, according to our instructions.

    Step 3: A clear base coat should be applied first. 

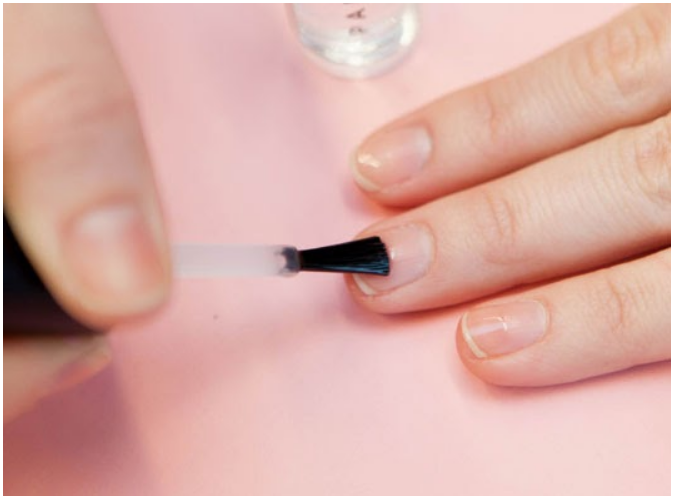
    Apply a thin layer of clear base coat to all of your nails. A clear base coat protects your nails from staining from colored polishes and helps to extend the life of your manicure by reducing the occurrence of chips in your nail paint.

    Step 4: Start by applying your base color polish.

    The basic color for ombré nails is generally white polish or the lightest color you intend to use for the ombré effect. While a white polish will make colors appear more vivid, choosing the lightest of your intended ombré polishes will result in a softer, more delicate ombré look. Apply this color to all of your nails as a backdrop. Allow your nail base to dry completely for a few minutes before applying next layers.

    • Paint two coats of your base color to get an opaque base. Allow the first layer to thoroughly dry before applying the second.
    • It is preferable to apply two thin coats of lacquer to your nails rather than one thick and heavy layer of polish to assist them dry quickly.

    Step 5: Using a makeup sponge, apply your ombré colors. 

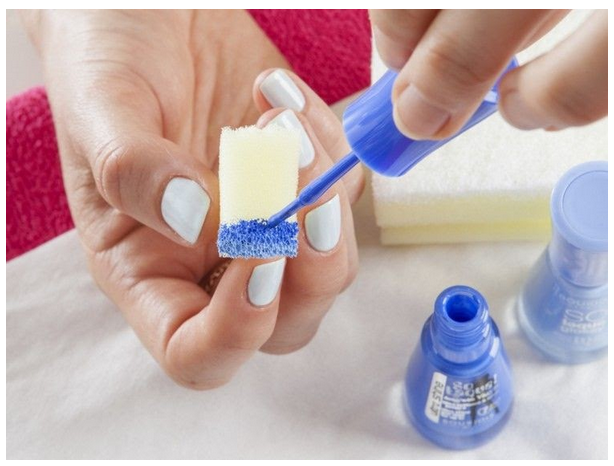
    Using a tiny makeup sponge, paint your ombré colors in straight, horizontal lines side by side. The area of the sponge that you paint with should be around the same width as your nail. Begin by drawing a line across the width of the sponge with the lightest nail polish color. Then, below the first color, paint with the next darkest color. Finally, apply the deepest polish color beneath the second line of polish. Make certain that all of the colors are painted adjacent to one other, with no visible sponge between them. For each color, apply a couple coats of polish on the sponge so that the polish is wet enough to print onto your nail.

    • The ombré effect is often created with two or three colors, but you may experiment with other colors and combinations to find what you like most.
    • It may help to wet the makeup sponge first before applying the colors. Fill the makeup sponge halfway with water. Wring out the sponge until about 80% of the water has been gone. Then, using the nail polish colors, paint on the nails.

    Step 6: Apply the polish to your nails using a stamping technique.

    Stamp the polish onto your nail by repeatedly pressing the sponge (with the polish side down) on top of your nail, taking the sponge away every couple of stamps to see if the ombré is dark enough and to your preference.

    Step 7: Apply the nail polish on your nails. 

    Roll the paint onto your nails by pressing the sponge’s side edge on the side of your nail. Gently slide the sponge (with the polish side down) across your nail to the opposite side. Repeat to deepen the polish colors and enhance the ombré effect.

    • This procedure will cause some nail paint to be transferred to the skin around your nails. To avoid this, apply a thin coating of petroleum jelly to the skin around your nails or apply tape to the skin around your nails. Otherwise, you can wipe the sides of your nails afterwards using nail paint remover.
    • There is a lot of flexibility in how you apply the color to your nail. To create your ombré effect unique and distinctive, modify the location of the sponge (stamping vertically on the length of your nail, tilting the sponge to particularly stamp on a specific hue).

    Step 8: Fill the sponge with nail polish. 

    After you’ve completed the ombré effect on one nail, refill the polish onto the sponge to keep the ombré colors moist and bright. Paint the nail polish colors in the same order as previously, starting with the lightest and working your way down to the darkest. Make sure that all of the polish colors are blending well with each other.

    • Keep in mind that if you try to ombré your nails with a sponge that isn’t sufficiently dampened with paint, the dry sponge will actually peel off your base color coat and damage your varnish.
    • If you stamp or roll your nails fast, you’ll probably only need to add polish to the sponge every other nail.

    Step 9: Finish with a topcoat. 

    After you’ve given all of your nails enough time to dry (approximately 10-15 minutes), apply a top layer of clear polish to them. Because sponging creates a stippled and rough appearance on your nails, you may want to apply two layers of top coat to smooth them out.

    Step 10: Make sure the skin around your nails is clean. 

    Swipe a tiny paintbrush or Q-Tip soaked in nail polish remover around your nails’ edges and cuticles.

    • The cotton on the Q-Tip will aid in the removal of polish from the skin, whilst the paintbrush will be more precise in removing extra nail polish.

    How to do ombre nails by using a nail brush

    The first 3 steps are the same as when you do ombre nails by using a sponge.

    Step 4: Apply the 2 colors polish

    If you’re going straight to your natural nails, start by applying and curing your base coat; if you’re using extensions, jump right to the color. Apply your first color shade from the base of your nail to about halfway up the nail. Then, take your lighter polish and apply it to the remaining half of the nail, carefully pushing the deep color up to meet the light polish.

    Step 5: Blend the colors together

    Take your nail brush with you. To get this look, use a brush with thin, wispy hairs to create the perfect faded appearance; ombré brushes are available for purchase for this reason. To begin blending the colors together, carefully tap the transition line between the two tones with the brush. Cure this layer with your UV or LED lamp. To get the ideal, gradual ombré look, repeat the previous process, applying your two colors and softly pressing your brush from side to side.

    Step 6: Apply a transparent layer and top coat

    Use a slightly more translucent paint to apply another layer on your nail. After applying and curing, paint the top coat to make sure that everything stays in place.

    Frequently asked question about how to do ombre nails

    Q: Can I do ombre nails with regular polish?

    A: Of course! We recommend you use regular polish with the sponging technique but gel polish when using the nail brush.

    Q: How can I remove the extra nail polish off my skin?

    A: Once your nails are dried, wash it off. You may need to massage a little. You could also soak a q-tip in nail polish remover and wipe away the excess nail polish.

    Q: Where can I get a sponge like the one in this article?

    A: The sponge they’re using here is a cosmetics sponge (or cosmetic wedge), which you can find anywhere beauty products are sold. Some dollar/pound stores could have these too. You may use any sponge, although ones with air bubbles will provide a less smooth finish.

    Summary

    Going to a nail salon is comparable to doing ombre nails at home. You should have a pleasant time doing this if you have the right equipment and the patience to learn.

    Because each of the steps we listed is essential, you should finish them all without skipping any of them. If getting your ombre nails done is too difficult, you can come to Rachel’s Nails for it. We apply ombre nails with professional polish and specific equipment, and then apply a nail treatment coating on top of your nails. Rachel’s Nails offers not only manicures but also pedicures and cosmetic treatments.

    Every time you visit our nail salon, you will be served by expert nail technicians. We want to make sure that when consumers visit Rachel’s Nails salon, they get the best experience possible. Everyone can afford our prices. Aside from that, we provide high-quality products and services. We are located at 12a Norcot Road, Reading, UK. Here is our website https://rachelsnails.co.uk/ and you can read our blogs to get more information about nails.

    We hope that you find this article helpful and you can follow the tutorial about how to do ombre nails at home quick and easy.

  • How To Dry Nails Fast – Quick Tips

    How To Dry Nails Fast – Quick Tips

    There is no better way to spend some relaxed time than to acquire or give yourself a beautiful manicure. Nothing beats a stylish set of nails, whether you’ve been eyeing numerous cosmetic trends or want to keep things simple with an everyday manicure.

    All of the pleasure, though, comes to an end when it’s time to dry your nails. You risk damaging your manicure if you don’t wait long enough. And, of course, with a hectic schedule, waiting too long is out of the question. So you’re probably wondering how to dry nails quickly. Look no further if you’re sick of dealing with a smeared manicure.

    We’ll show you how to dry nails fast, including some useful suggestions, in the section below. But first, let’s look at how long nail paint should take to dry.

    How long does it take for nails to dry completely?

    It’s time to address the age-old question: How long does nail polish take to dry? While it’s tempting to believe that your nails only require 10 to 15 minutes to dry, previous manicure sessions have proven that even after waiting, your nails might get smeared.

    The fact is that nail paint might take up to two hours to dry. And, while a few hours might feel like an eternity when you have a busy schedule, it’s critical to get your manicure to set quickly so you can get on with your day.

    Because the surface layer of your nails dries first, you may believe they dry faster than they actually do. You may softly touch your nails and feel them dry, only to ruin them a minute later when you use your hands for anything.

    This is due to the fact that your nails are only dry on the surface; the lacquer below is still wet and might be damaged, smeared, and so on.

    How to dry nails fast without making smeared 

    Are you ready to find out how to dry your nails quickly? Continue reading for four ideas on how to speed up the drying process and achieve a perfect manicure in no time.

    Using fast-drying nail polish

    Using fast-drying nail paint is one of the simplest techniques to help your manicure dry quickly. Fast-drying nail lacquer, unlike other nail paint formulations, works to dry and set your nails in a matter of minutes. There is no need for a lengthy drying time. With so many color and finish options available, you’re sure to discover the right polish for you.

    Paint thin nail layers

    Paint your nail paint on in light, thin layers, allowing each layer to dry between coats. Apply 2-3 thin, light coats of polish after wiping off a bit of polish from your applicator brush. Allow your polish to dry for 1-3 minutes between coats. If you apply numerous thick coats of nail polish, it will not dry fully.

    • It will take longer to apply the polish this way, but it will dry much faster.
    • Paint each nail one at a time, then repeat in the same sequence. If you take your time painting each nail, the first one will be ready for its second coat by the time you finish the last one.

    Hair dryer is also a very good option

    For a quick fix, use a blow dryer to blast cold air for 2-3 minutes. Connect your hairdryer and set it to the cold air setting. Then, for 2-3 minutes, run the cool air across your fingertips. The chilly air may cause your nails to dry rapidly.

    • Do this for both hands to fully dry each nail.
    • Before you begin, make sure the dryer is set to the low setting. To avoid harming the polish, hold the hairdryer 12 inches (30 cm) above your nails as you dry them.
    • Your nail paint may begin to bubble or ripple if you use a warm heat setting or hold the dryer too near.

    Immerse your fingertips in a basin of cold ice water

    Allow your nails to air dry for 60 seconds before filling a small basin halfway with extremely cold water. Then, add 2-5 ice cubes. Hold your fingertips in the icy water for 1-2 minutes before removing them from the dish. In general, cold hardens nail paint, so an ice bath is an excellent technique to get your nail polish to adhere.

    • When applying this method, use caution since it might damage your nail paint if you dip your hands in the water too quickly. The polish should be virtually dry at this point.
    • While this speeds up the drying time of your nail paint, it will make your hands incredibly freezing!

    Put your hands in the freezer

    As much as we dislike being cold, when it comes to our nails and the opportunity to not smudge them before they’re dry, we’re ready to go to any length. In this situation, it entails placing your hands in the freezer for a few minutes. The cold air will assist to harden the top coat of polish, allowing you not to be too cautious after having your manicure done.

    Spray your wet nails with an air duster

    An air duster is a blast of chilly, pressurized air that shoots out fast. Hold the can around 30-45cm away from your hands to keep them from getting too chilly. Your nails should be mostly dry after a quick 3-5 second spray over your fingertips. Because the air is chilly, this works great for drying nail paint. Make sure the sprayer is aimed towards your nails.

    • Before you spray your nails, make sure they’re mostly dry, since air duster might damage your nail paint. You may unintentionally harm the polish’s surface.
    • Air duster may be purchased at most office supply stores.

    To save time, try using drying drops or setting spray

    Are you ready to decrease your drying time in half without making a mess? It’s time to get to know quick-dry nail drops. This product not only dries your manicure quickly, but it also protects your nails from dents, smudges, and scratches. Some formulations are also effective at nourishing your cuticles and nails. Essentially, it is a must-have. All you have to do is dab one or two drops onto newly polished nails. Wait a minute or two for them to dry, and everything is ready to go!

    When it comes to avoiding messes, a nail polish drying spray is a wonderful option. You can depend on obtaining the perfect manicure with every usage because it is ideal for minimizing drying time. Simply wait a minute after painting your nails before spraying evenly over each nail with the can held a few inches away from your hands.

    • Nail drying treatments, such as sprays and drops, are available at many beauty supply and pharmacy stores.

    Frequently asked question about how to dry nails fast

    Q: Can I dry my nails in front of an air conditioner rather than a freezer?

    A: Yes, this will aid in the drying of your nails. Anything that helps your nails harden faster will help them cool faster.

    Q: Can I wash my hands in the sink with cold water?

    A: Cold water can assist, but make sure it isn’t a strong stream otherwise it can ruin your nail polish/varnish.

    Q: Is the ice water technique suitable for nail art?

    A: It is determined by the amount of nail art present. If there is only a small amount, it will dry properly. If there is a lot, it will either fail or take a very long time. However, if you use a fast-drying top coat, that will assist. In this instance, we propose that you use UV/LED light to dry your nails.

    Summary

    There is nothing more frustrating than spending a couple of hours sitting with your hands in front of you, trying to avoid touching things for fear of damaging your freshly painted nails. We hope that all the information that Rachel’s Nails has provided above may help you overcome this situation. How to dry nails fast is not that difficult.

    Every day, ensure that you have a fundamental understanding of nail care and protection. You can apply all of the nail care methods we listed above or come to our nail salon for nail care to get faster results. We may be found at 12a Norcot Road, Reading, UK, or online at https://rachelsnails.co.uk/.

    We believe that this article can help you to figure out the proper ways about how to dry your nails fast with easy tips.

For last minute appointments or booking issues please direct call our number 07402286286.